
KB User's Guide - Documents Tab - Overview of Classic Editor Fields and Settings
Note
This document describes the fields and settings as they appear in the classic doc edit screen, which will eventually be retired. For information on how to work with the same settings in the new edit screen, please see:
Template
The "Template" field will only appear on the Create a Doc... screen. Selecting a specific item from the dropdown list in the Template field allows you to populate document fields and settings based templates that you have already created. If you have not created any templates yet, it will show "No templates defined or available". For more information on working with templates, please see KB User's Guide - Documents Tab - Creating and Using Templates.
Title
A well-written title tells the reader what a document is all about, and is critical in providing document clarity. For example, an effective title could begin with the name of the product or service, followed by the subject of the document (For example "Google Chrome - Clearing Cache and Cookies"). It is important to make the title clear and concise. The maximum length of the title is 200 characters. Title is a required field as designated by the asterisk.
Keywords
Keywords are important for making sure your document can be found by users when they are searching your live site. When a user searches your site, the default search mode for most sites matches their search terms against your document title and keywords. The keywords field is a required field as designated by the asterisk.
Keywords should include any important terms that are relevant to your document, especially if they do not appear in the title. This includes product or service names, key concepts, error codes, misspellings, and other words and phrases a user might enter when searching for your document. Keywords should be space separated (though using commas are fine). Searches are not case-sensitive, so you do not need to capitalize words. Please note that keyword phrases are currently not supported, so we do not recommend trying to group keywords with quotations, as this may cause issues when searching.
The KB has a list of synonyms that are automatically indexed for certain terms, particularly those related to common IT terms and actions. For example, if you include the keyword "delete" in your keywords, your document will automatically be searchable using the words: delete, deletes, deleted, deleting, deletion, deletions, remove, removes, removed, removing, and removal.
If you have access to the Stats tab in the KB Admin Tools, you can go to the Synonyms page via the left-side navigation to view a full list of the synonyms we support.
Search priority
The Search priority dropdown list contains a number of options:
- If Top priority is selected when the document is activated. The document will appear before all documents with lower (High, Normal, and Low) search priority levels in KB search results. When Top priority documents appear in the live site search results, they will appear with four gold asterisks ahead of the document title. Top search priority should generally be reserved for documents that cover core concepts and point users to other more specific documents, essentially, documents that serve as a starting point.
- If High priority is selected when the document is activated, the document will appear in after any results with Top priority, and above any documents with Normal and Low search priority levels. High priority documents appear with three gold asterisks before the title. If you hover your mouse over the asterisks, you will see the High priority label as a tooltip. High search priority is useful for particularly popular documents, as well as documents that link out to others.
- If Normal priority is selected when the document is activated. The document will appear after any High or Top priority results, and before all documents with Low search priority. By default, all documents are set to Normal priority.
- If Low priority is selected when the document is activated, the document will follow all documents with higher (Normal, High, and Top) search priority levels. By default, glossary items are set to Low priority.
- If Exclude from search is selected when the document is activated, that document will not appear in search results on the live site, nor will it be included in the "Top Documents of the Week" or "Most Recently Updated Documents" feeds. Documents with this setting can only be accessed by going directly to the page URL, for example, by linking to them. The Exclude from search option can be particularly useful for short documents/texts (e.g., disclaimers, warnings, and credits) that are meant to be included in other KB documents.
Page header and Page footer
The Page header and Page footer links allow authors to apply predefined headers and footers to their documents using a dropdown list. Users with publish rights can also define new headers and footers or edit existing options using these links. For instructions on how to apply, define, and edit headers and footers, please see: KB User's Guide - Documents Tab - Creating and Using Document Headers and Footers
Summary
A good summary succinctly indicates the purpose and/or the main point or issue of the entire document so that a user may glance at the opening paragraph and quickly see what is available in that document. The summary is meant to be a basic description of what the user will learn from the document, and in general, only requires plain text. You cannot use the rich text editor to format text in the summary field. You may, however, change the appearance of content in the summary or add links using HTML code if desired. The summary field is a required field as designated by the asterisk.
Body
The Body field contains the bulk of the information in a KB document. The body of your document is created using a What You See Is What You Get (WYSIWYG) editor, which allows you to compose rich text content. It also includes a "Source code" option, which allows you to edit the HTML of the document directly.
For more information on the various formatting options and features available in the editor, please see KB User's Guide - Documents Tab - Guide to TinyMCE Editor Buttons.
Attachments
You can use the Attachments tool to add images and other files to your document. Common image types (.png, .jpg, .jpeg, and .gif) can be embedded in your document, and other files as well (e.g. .pdf, .docx, etc.) can be linked for users to download. For more information about adding attachments to your document, see KB User's Guide - Documents Tab - Adding Images and Other Files to Your Documents.
Show other notes
Clicking on the ![]() (plus) icon to expand this section will reveal the My group note field.
(plus) icon to expand this section will reveal the My group note field.
- Note: This section previously contained the "Internal note" field, but this field has been retired. Any existing content in this field will be automatically moved up into the "Body" field and wrapped in internal content restriction tags the next time the document is edited.
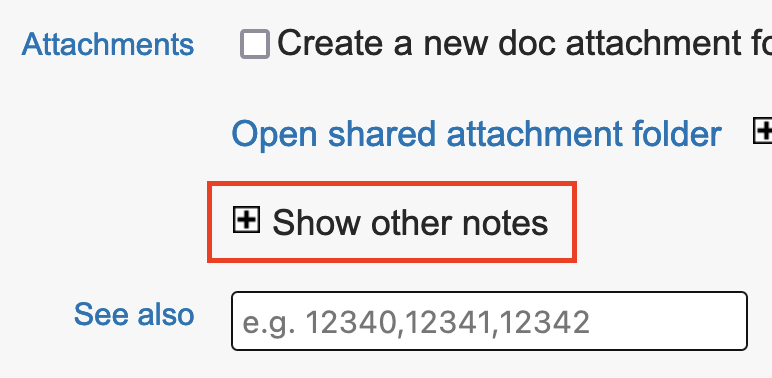
My group note
The "My group note" field allows you to add information to a document that will only be visible on your live site, and not on any other sites where it might also be published. It is the only text field that is editable by groups with whom a document is shared. Information entered in this field will be visible to your own group's internal and/or external sites. The "My group note" field is group-specific, so if a document shared across multiple groups, each of these groups can enter their own content in this field. The "My group note position" dropdown allows you to choose whether the text appears Above Summary or Under Body (default).
See also
The "See also" field can be used to link to other related documents. Simply enter the document ID number(s) you wish to link to in this field separated by commas.
When the document is viewed, a bulleted list will be displayed with links to the document(s) you specified. The current document title(s) will be used as the link display text. Please note that only links to published, unexpired documents will be displayed to users.
Auto Redirect for "Obsolete" Documents
A secondary use for the "See also" field is to create a redirect from a document you are archiving to one that is still published. Please see KB User's Guide - Documents Tab - Redirecting a Document for instructions on using this feature.
Up, Previous, Next
The "Up", "Previous", and "Next" fields can be used to link documents in a logical sequential order. This may be useful when creating training documents or when creating longer documents that need to be broken up into separate pages.
- Note: The "Up" field has been renamed "Overview document" on the new edit screen. All three fields are now under the label "Guided navigation".
Like with "See also" links, if a user does not have access to a document that is referenced in one of these fields due to status or restriction, that link will not be displayed for that user.
Up
Use the "Up" field to link back to the "parent" document in the series of documents, e.g. a "Table of Contents" or overview document. This might be blank if no parent document exists, or if this is the first document in the sequence.
Previous
Use the "Previous" field to reference the document ID that precedes your document in the desired sequence. This would be blank for the first document in the sequence.
Next
Use the "Next" field to reference the document ID that follows your document in the desired sequence. This would be blank for the last document in the sequence.
Example usage of Up, Previous, Next function
You can see a working example of this feature in our KB Author Training document. Starting with the KB Author Training - Overview, you can click through the links in the table of contents and see how the links at the bottom of each page guide you through the documents in order.
Type
In addition to a standard document, there are two other document "types"—templates and glossary items. The "Type" dropdown can be used to change the type. The most common use case for this dropdown is to create a new template, though it is also useful if you decide that you need to change a document to a glossary item (or vice-versa). Please note that glossary items can also be directly created via the "Create a Glossary Item" link in the side navigation for the Documents tab.
Topics
The "Topics" section is used to categorize documents in your site. You will only see topics listed in this area that have been created and are active under the Topics tab. Please see KB User's Guide - Topics Tab - Adding, Editing, and Deleting Topics for more information on building a topics tree for your group.
KB documents can be categorized under more than one topic as appropriate. If your topics tree uses multiple levels, child topics will be collapsed under the ![]() (plus) button, which you can then click to expand. Topics may be selected from any level in the hierarchy, and in general, you only need to choose the most specific topic that applies, i.e. you do not need to check parent topics in a branch where a child topic is already selected.
(plus) button, which you can then click to expand. Topics may be selected from any level in the hierarchy, and in general, you only need to choose the most specific topic that applies, i.e. you do not need to check parent topics in a branch where a child topic is already selected.
The "Topics" section is one that can be edited by any group with whom a document is shared, as it only displays the current group's topic trees. This allows all groups with access to the document to categorize it appropriately for their sites.
Audiences
The "Audiences" field provides a way to associate a document with the population of users for whom that content is relevant. Like with topics, you can associate a document with as many of your group's audiences as appropriate. For more information on working with audiences, please see KB User's Guide - Topics Tab - Audiences.
Write access
Standard Access Options
The "Write access" field controls which authors have permissions to edit the content of the document. When a user without write access or publish rights attempts to edit the document, they will get an error message. If they have publish rights but not write access, they will only be able to change select document settings, such as topics and status. All content fields will be grayed out.
- Note: The "write access" setting has been renamed "edit access" on the new edit screen.
There are four standard options:
-
Owner: Allows only the owner of the document to make edits.
-
Owner group admins: Allows all admins of the owner group to make edits; this includes all authors who have been granted both GroupDocs (gDocs) rights and Publish rights, regardless of whether they have access to all tabs in the Admin Tools. This will also include users with OwnerDocs (oDocs) rights, provided they are the current owner of the document.
-
Owner group: Allows all members of the owner group to make edits. This includes all authors who have been granted GroupDocs (gDocs) rights, regardless of whether they have Publish rights. This will also include users with OwnerDocs (oDocs) rights, provided they are the current owner of the document.
Tip
Hovering over any of these options will display a tooltip with a list of all of the users in your space that the setting would include.
Custom Access Options
If you need to customize write access beyond the four standard options, KB admins can define User Access Groups or document-specific Group Authorization rules, and these custom groups will appear as checkboxes after the four standard options. By default, they will be collapsed, but you can view them by clicking Show all write access.

If the main write access option is set to "Owner group admins", selecting a custom write access group will grant edit permissions to both users with publish rights as well as members of the group. If either of the latter two main write access options are selected, editing rights will be granted only to members of the group. The owner of the document will always have write access, even if they are not a member of a selected custom write access group.
Read access
Access Options
The "Read access" field specifies which users have are allowed to view the contents of the document. This is controlled by the same User Access Groups and document-specific Group Authorization rules that are used to customize write access for documents. Please note that read access restrictions cannot be applied to documents that are published to your external site.
To view available groups that can be used to restrict read access, expand the Show all read access section.

If no read access groups are selected, then a document's read access is strictly determined by site access, i.,e. a document published to an internal site is accessible to relevant your internal users, and an external document is accessible to the world.
Access Effects
Once a document is restricted to one or more read access groups, it is only viewable to members of those groups, even within the KB Admin Tools. If a user is not a member of the group(s) checked for read access, they will see the following:
-
Internal KB Site: Standard "Page Not Found" error
-
KB Admin Tools: All authors will be able to see the document title, but if they attempt to navigate directly to the document to view it, they will see the message "Sorry, you do not have access to view document ###### in this group space."
If the user has publish permissions, they will be able to access the document edit screen, though the text fields will all read, "Content hidden because you do not have read access. You may, however, as an admin with publish right, change the topic assignment and status of this document."
Site access
The "Site access" field allows you to choose where a document is published. This section will always show your KB live site(s), and it can also display other groups' live sites if you establish a sharing relationship as described in KB User's Guide - Settings Tab - Managing Group Relationships.

Clicking on the ![]() (plus) sign next to "Show other site access" will display a list of other KB sites with whom you may share documents. You will also see which group spaces have opted to Trust Activation for documents you share with them.
(plus) sign next to "Show other site access" will display a list of other KB sites with whom you may share documents. You will also see which group spaces have opted to Trust Activation for documents you share with them.
Campus access
The "Campus access" field allows individual documents to be put behind a general campus login and therefore not accessible to the general public.
Documents that are behind a general campus login (i.e. one of the latter two options are selected) are accessible to anyone with valid campus credentials. When a user attempts to access a campus access-restricted document, they will be prompted to log in (if they aren't logged in already) before the document content is shown.
-
Defer to Site Access: Document and attachment access will be determined by KB sites selected in the Site Access and Other Sites fields. Only users with standard internal KB permissions to the selected site(s) will have access.
-
Ext/Internal with campus login: Document and attachment access will be limited to campus authenticated users. If external SiteAccess is also selected, the document is searchable externally, and the document title is exposed to external site users, but document content access will require users to log in. External search results will indicate that campus login is required for these documents. For this option to work as intended, internal SiteAccess must be also selected.
-
Internal for all campus users: Document and attachment access will be limited to authorized internal users and ANY campus users with valid login credentials who navigate to the chosen internal site URLs. For this option to work as intended, only internal SiteAccess should be selected. Please note that generic campus users authenticating to a space's internal KB site will only be able to access these documents as well as external documents.
Note: Hovering over each of the campus access options will show a tooltip with an explanation for each option.
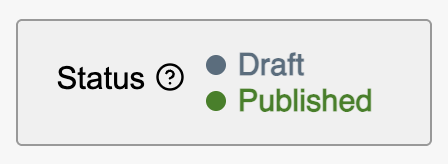
Status
The Status field indicates document status in the document creation, review, and publication cycle. There are four possible values:
- Draft: A document in this status is actively being edited. It may be a new document that has never been published or a previously published document that requires edits.
-
Pending review: A document in this status indicates edits are complete and are ready to be reviewed and/or published. Use this status to have new or updated documents published, or after adding notes to indicate action is necessary.
-
Published: A document in this status have been properly reviewed and revised. Once a document is published, it is available to end users on the site(s) that were selected with the "site access" setting. The only exception is if the document has expired, in which case, it will not be available to end users until its expiration date is extended.
-
Archived: A document in this status has become obsolete or expired. It can still be accessed in the KB Admin Tools.
- Trash: This is an optional status that is a step beyond "archived". Like with archived documents, the trash can only be accessed in the KB Admin Tools. This status should primarily be used for documents that were created for testing purposes, docs that are duplicates, or those that were never completed for publishing. Trash documents can still be viewed in the KB Admin Tools unless you opt to purge their contents entirely.
Note: KB Groups may use these options differently. For example, groups that give all of their authors "Publish" rights may not use Pending review at all.
Dual Status
In some cases, documents will appear to have two statuses simultaneously in the KB Admin Tools. This is referred to as "dual status" and specifically applies to documents that are published while also have a second, more recent version that is either a draft or pending review.
When a document is in dual status, end users will only see the published version on your live site(s). The draft / pending review version will only be visible to your authors in the KB Admin Tools. When the draft / pending review version is published, it will overwrite the previous published version for your end users.
You can easily compare the published and draft versions of a document in dual status with the Draft vs publish comparison available on the document review screen (under the More menu) or document edit screen (under the Options menu).
Activation
Use this field to set a date for activation. This can be useful for preparing documentation in advance of a product or service rollout. For deferred activation date time to take effect, the document status must be set to Published. In other words, if the document is not published on the activation date the document will not be available. Clicking on the Pick activation time link will lead you to a pop up calendar. Clicking on any date on this calendar will auto-populate the Activation field. For details on the Future Activation feature, please see future KB User's Guide - Documents Tab - Scheduling a Future Publish Date
Expiration
Use this field to specify a date when the document will expire. Once a document expires, it will no longer be available for searching or viewing via any KB web sites. It will still be available for searching in the KB Admin Tools as an expired document. For more info see How to Set Document Expiration Date. Clicking on the Pick activation time link will lead you to a pop up calendar. Clicking on any date on this calendar will auto-populate the Activation field. Clicking on the Never link sets the Expiration date to 3000-01-01 00:00:00...not exactly never, but close.
Additional Fields
If you expand the Additional Fields section by clicking on the ![]() icon, you will have some additional options available.
icon, you will have some additional options available.
Owner
The Owner field indicates the name of the person who has authored or provided the original content. Questions about documents and review requests are directed to the document owner.
Notification
The Notification field allows you to notify the document owner, or owner group (My group), or groups sharing the document (Sharing groups) when you create, update, publish, or archive the document.
Feedback to
The "Feedback to" field allows you to specify at the document level where user feedback should be routed. This is implemented in addition to existing group feedback option, which typically routes user feedback to document owner and/or group email address.
- Note: This field has been renamed "Send user comment to" on the new edit screen.
This field is optional and should contain valid, comma delimited email addresses only. There is no need for a comma if there is only one email address. The document creating/editing form does not validate the syntax of proper email addresses, but it does remove duplicate addresses and extra commas.
Change threshold
The "Change threshold" field allows you to override the group-level change threshold, which is used for triggering change notification to subscribers as well as requiring other groups that share the document to review the changes before activating the document for their respective group spaces.
Other options
The following options are available under the this section: Blog, No reminder, No keyword suggestion, No comment, and HTML only mode.
- Blog - Enables the blogging option for the published document.
- Note: This setting has been renamed "Allow internal discussion" on the new edit screen.
- No reminder - Disables review reminders for documents that don't need to be reviewed (eg. meeting minutes).
- No keyword suggestion - Disables the "Suggest keywords" button in the published document.
- No comment - Disables the "Comment" button in the published document.
- HTML only mode - Disables the WYSIWYG editor so that the document can only be edited with the KB's native HTML editor. This is intended for instances where the doc body must contain JavaScript that can't be processed by the WYSIWYG editor, or if you would like to ensure that your HTML will not be modified the WYSIWYG editor.
Custom URL
A custom URL is intended for instances where you would like to have a human-readable, text-based alternative URL for your document. The text will follow the last slash in your document where you would typically see the document ID number (e.g. kb.wisc.edu/my-clean-url/). Clicking the "Generate" link to the right of this field will generate a custom URL using the words in your title (lowercase and separated by dashes). You may then manually edit the text as desired. Please refer to KB User's Guide - Documents Tab - Custom URL Field to learn more about this feature.
JavaScript/CSS
Placing code in this field allows the creation of page-specific JavaScript code and CSS. Authors will no longer need to manage JavaScript code nor CSS with the actual content (Body field). To locate the JavaScript/CSS input box, expand Additional Fields at the bottom of the document editor.
Because this field allows the input of both JavaScript and CSS, code entered here should be wrapped in <script> </script> tags or <style> </style> tags, respectively.
You may also use this field to call external JavaScript or CSS files that you have uploaded to your document's attachment folder or group's Shared Attachment folder.