Topics Map > Documents Tab
KB User's Guide - Documents Tab - Import & Export
Note
You must have full administrative permissions in your space to perform these steps. This means access to the Documents, Settings, and Users tabs.
Export Active Content Available to Your Group as HTML
The HTML Export tool is useful in creating an offline backup of important KB content. This allows you to store your content as a static file that would remain accessible in the event of a network outage or service interruption. This is particularly important if you use your KB to store critical procedures that you might use in the event of an emergency, or that you might otherwise rely on for key aspects of your work.
Because your KB content is updated regularly, you may wish to schedule a reminder to export a fresh backup on a regular basis. For instructions on setting up this notification, please see: KB User's Guide - Settings Tab - Notification Settings
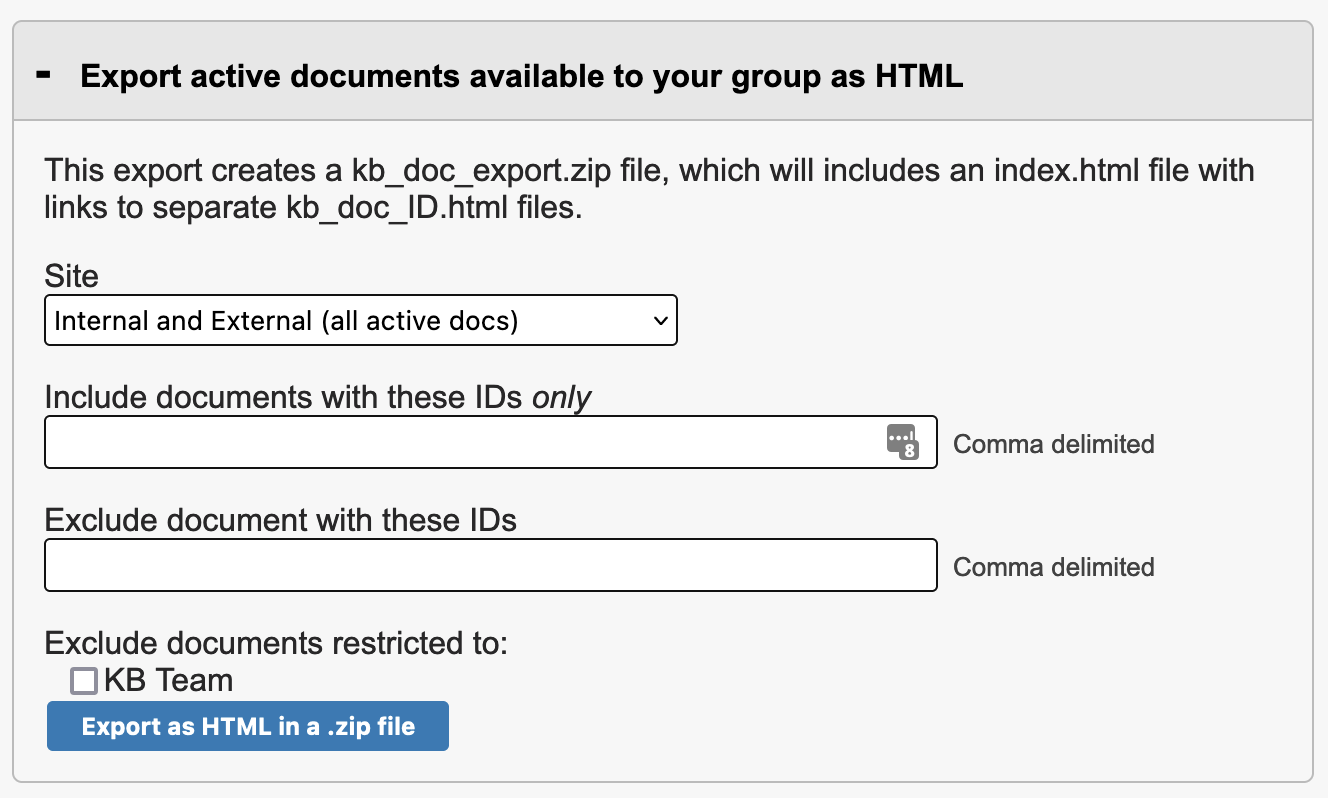
The image below shows the fields in the Export active documents available to your group as HTML section. We will review each field.
-
Site - From this dropdown menu, make your selection from the six options which export content available to your group as an *.html file. The following are the options available to you from this dropdown menu:
- Internal and External (all active docs) - This is the field's default setting
- Internal (all docs available via internal site)
- External (all docs available via internal site)
- Internal only (all docs available only via internal site)
- External only (all docs available only via external site)
- All docs owned by this group (all statuses)
-
Include documents with these IDs ONLY - You may enter a list of comma delimited document ID numbers to include and/or exclude when exporting. For more information on how to limit a list of documents by owner, topic, etc, please see KB User's Guide - Users Tab - Search and Display Filters on the Existing Users Screen.
If you plan to export a large amount of content (>100 documents), it is recommended that you split this up into multiple exports, for example, one export per topic area. If you attempt to export too much content at once, the resulting HTML file may be too large for your browser to process after opening.
- Exclude documents with these IDs - Specify the document IDs you do not wish to export by listing a comma delimited list. Example: perhaps you wish to exclude glossary terms, news items or meeting minutes.
- Exclude documents restricted to <User Access group> - Exclude documents based on User Access Group - Specify a User Access Group by checking the box next to the appropriate group displayed. This will prevent the export of documents restricted to those group(s).
- Export as HTML in a .zip file button - Click this button to download an HTML file that contains an index of links for active document titles. These links will point to the documents contained within your Content export file.
You will get a pop up message from your browser listing a folder named "kb_doc_export". The kb_doc_export.zip file will include an index.html file with links to separate kb_doc_ID.html files.
-
Notes:
- Each document title in the index.html is a hyperlink to the corresponding document file.
- The HTML file generally contains text-only document content. Because most image paths in the KB are relative, images will not load and alt text will be displayed instead.
- LinkDocs and IncludeDocs will show up as document ID numbers only.
- If you are using IncludeDocs to supply important content, be sure to export the documents themselves.
Export active documents available to your group as XML
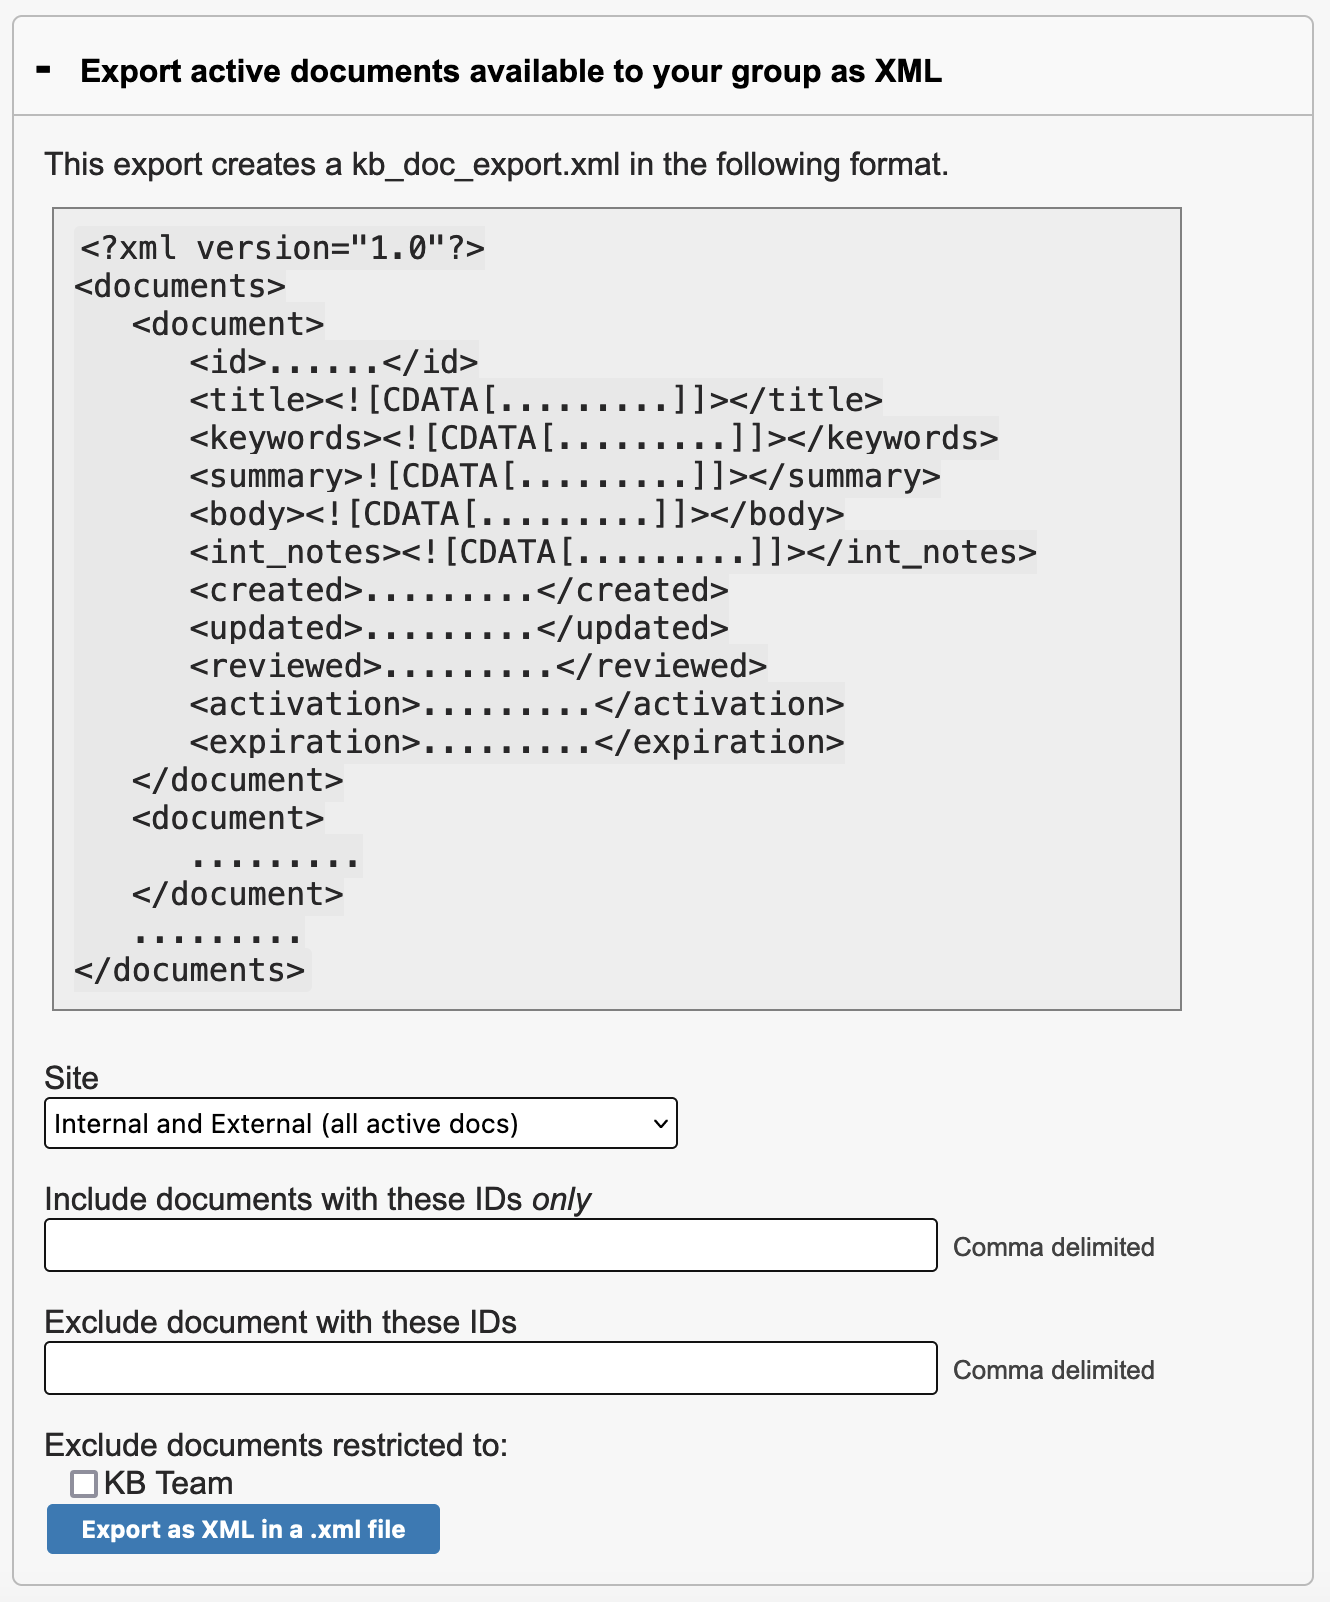
You may also export active content available to your KB group as an *.xml file.
-
Set each field as desired for your export:
-
Site - From this dropdown menu, make your selection from the six options which export content available to your group as an *.html file. The following are the options available to you from this dropdown menu:
- Internal and External (all active docs) - This is the field's default setting
- Internal (all docs available via internal site)
- External (all docs available via internal site)
- Internal only (all docs available only via internal site)
- External only (all docs available only via external site)
- All docs owned by this group (all statuses)
-
Include documents with these IDs ONLY - You may enter a list of comma delimited document ID numbers to include and/or exclude when exporting. For more information on how to limit a list of documents by owner, topic, etc, please see KB User's Guide - Users Tab - Search and Display Filters on the Existing Users Screen.
If you plan to export a large amount of content (>100 documents), it is recommended that you split this up into multiple exports, for example, one export per topic area. If you attempt to export too much content at once, the resulting HTML file may be too large for your browser to process after opening.
-
Exclude documents with these IDs - Specify the document IDs you do not wish to export by listing a comma delimited list. Example: perhaps you wish to exclude glossary terms, news items or meeting minutes.
-
Exclude documents restricted to <User Access group> - Exclude documents based on User Access Group - Specify a User Access Group by checking the box next to the appropriate group displayed. This will prevent the export of documents restricted to those group(s).
-
-
Click the Export as XML in a .xml file button to download documents as an XML file.
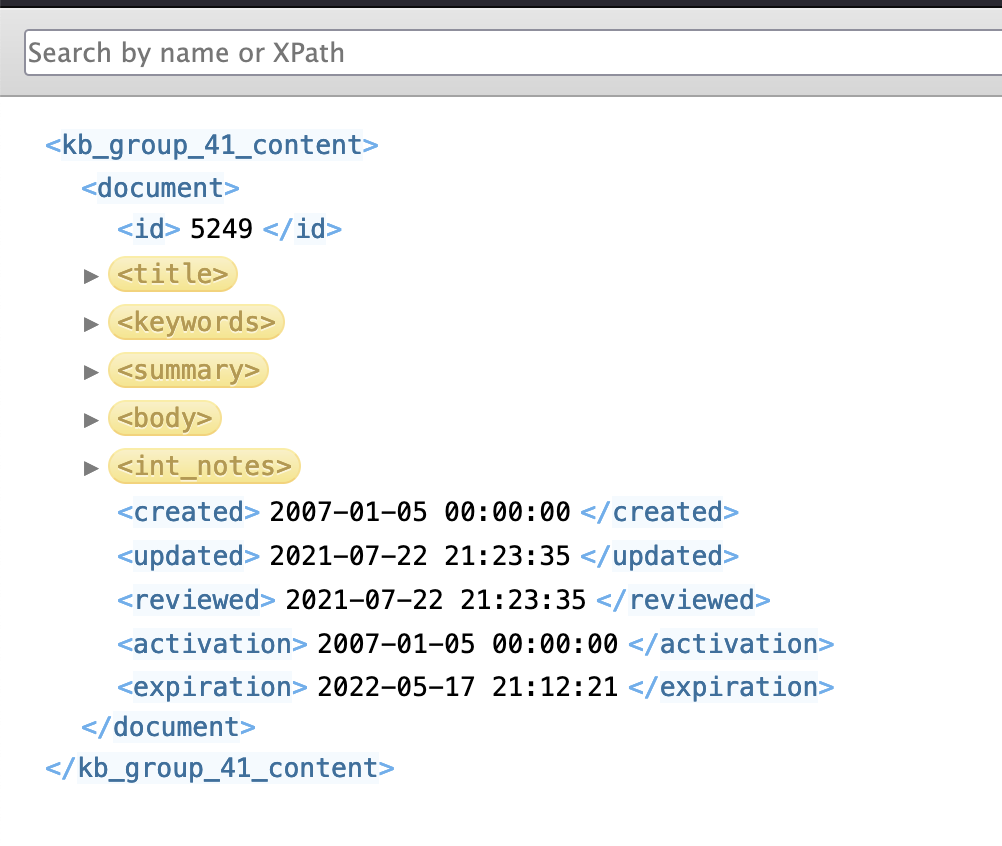
In the image below, we see the Export file structure of the downloaded *.xml file. Note the arrows in front of title, keywords, summary, etc. They are expandable.
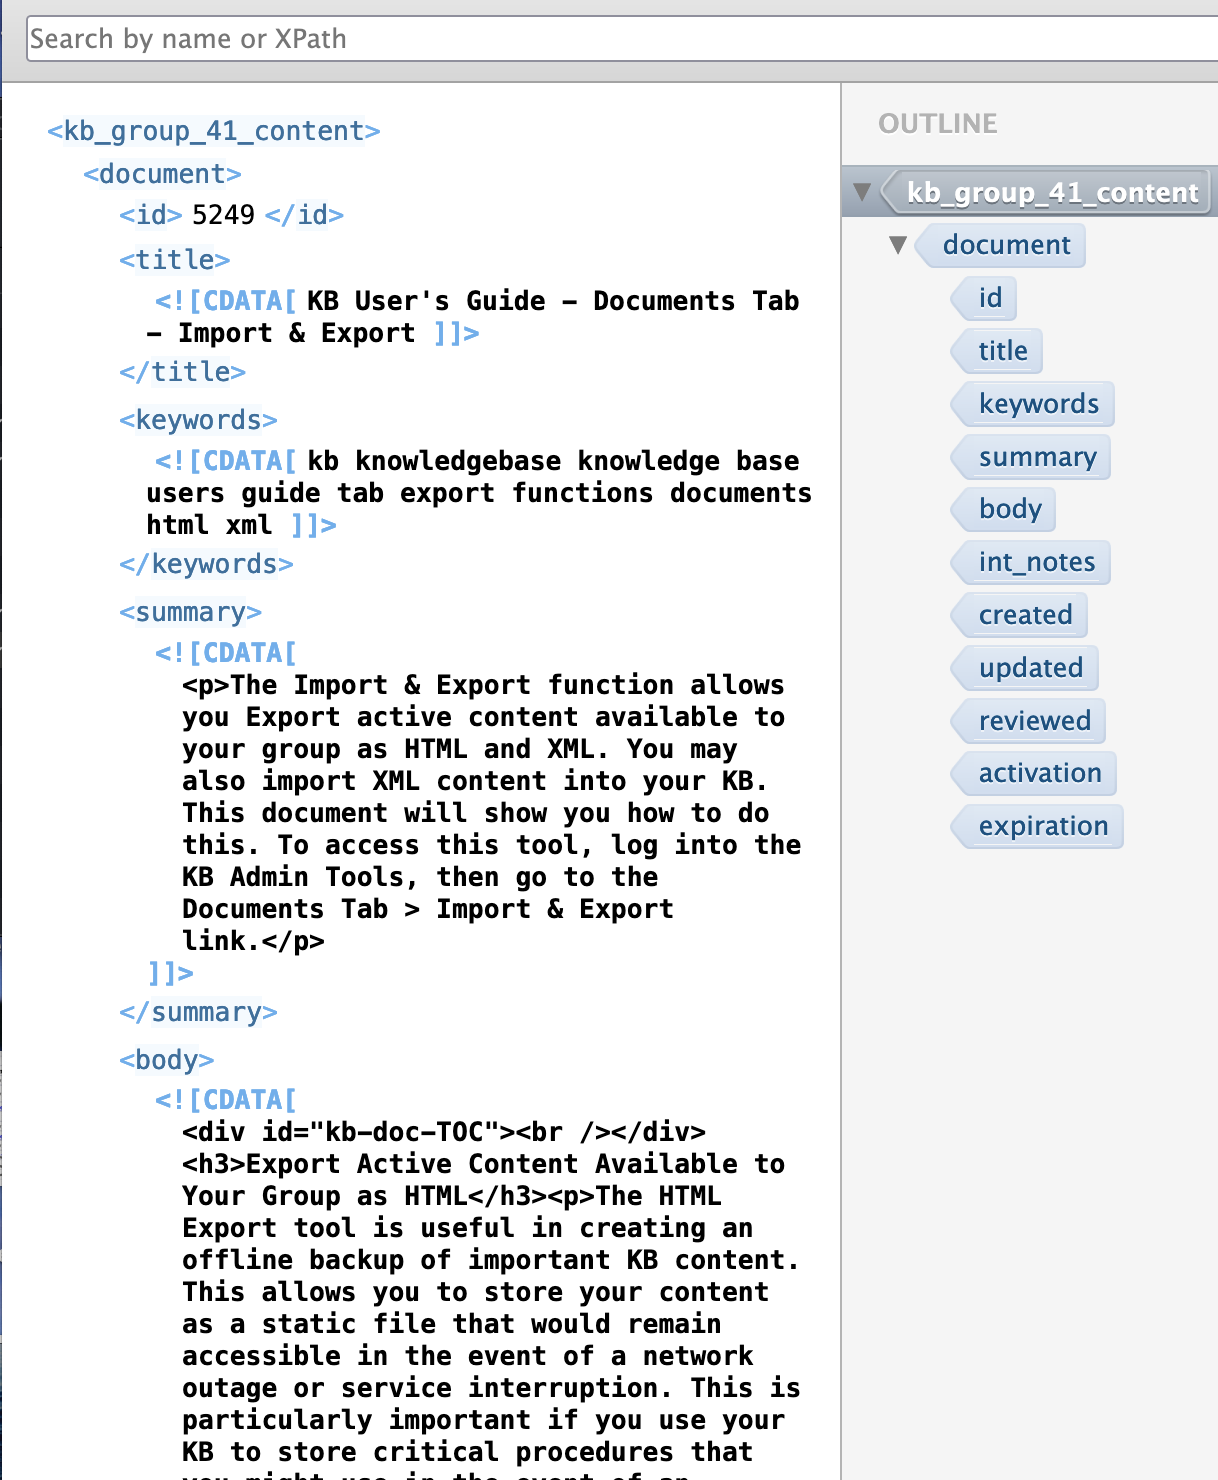
After clicking on all the arrows, you will see the content in each field. The image below shows the content in the id, title, keywords and summary fields.
Import XML content with multiple kb_document elements as multiple documents
-
Follow the format as prescribed in the window below when creating your *.xml file. Be sure to include all required fields (title, keywords, summary, and body). If you do not have data for the required fields, you may enter a space in that field as a placeholder.
<?xml version="1.0"?>
<kb_documents>
<kb_document>
<kb_title>.........</kb_title>
<kb_keywords>.........</kb_keywords>
<kb_summary>.........</kb_summary>
<kb_body>.........</kb_body>
<kb_int_notes>.........</kb_int_notes>
<img_base_url>.........</img_base_url>
</kb_document>
<kb_document>
.........
</kb_document>
.........
</kb_documents>
Note: The
img_base_urlis intended for cases where your content contains images hosted under another domain but references them as a relative path.For example, if you are importing content from "https://your.site.com", and the images in your content do not include that domain in their path (e.g. paths are formatted like "/images/folder/filename.png"), you should enter "https://your.site.com" as the base URL.
-
Click on the Import Content from XML button at the bottom of the screen.
-
Click on the Browse button, then find and select the XML file you created.
-
If you XML file contains HTML entities in place of actual HTML tags (for example, a paragraph tag is encoded as
<p>instead of<p>), check the box to Decode HTML entity in body content.
-
-
Click the Continue button.
-
The documents created from your import will be set to the status of "In Progress". The person who performed the import will be the owner of the document(s).
Import from URL using TinyMCE
The Import from URL plugin is found under the Insert menu. It allows you to import the full HTML of a page hosted outside of the KB. You will be prompted to enter the URL to import, after which point the page's HTML will be added to the document body. This is handy for cases where you may be migrating content from a previous storage location into the KB.
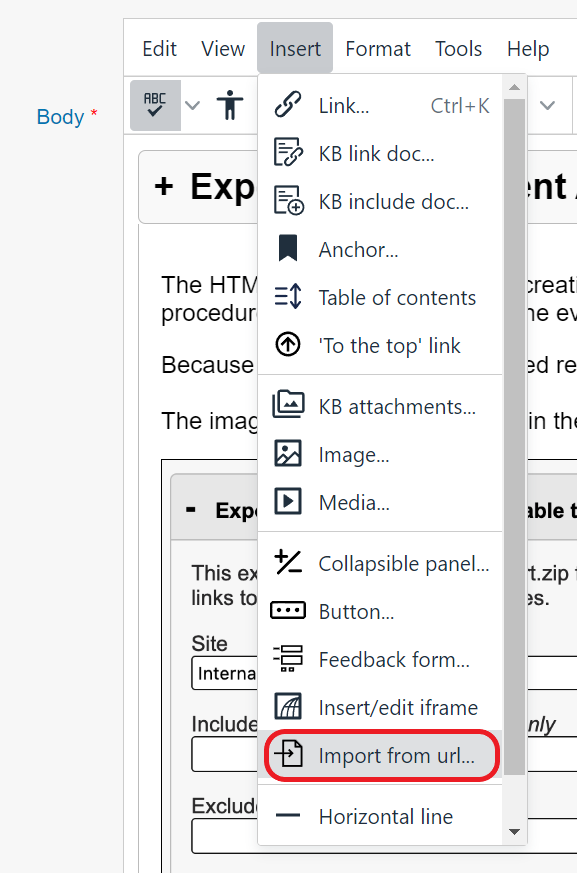
Please note that because the full page is imported, unwanted elements, such as page headers and footers, may need to be removed.
Import Confluence Wiki HTML content
For information on importing Confluence (aka Wiki) pages into the KB, please see KB User's Guide - Migrating from Confluence Wiki to the KB.
Best Practices
Here are some examples how other KB groups have used the Import & Export feature:
Import
- It is easy to import a large source of data (example: cut and paste from an existing web site and go in and apply formatting afterward in the KB Admin Tools).
- Migrate any amount of content into your KB all at once
- Images contained in the source content will be automatically uploaded into individual document attachment folders
- A way to start a set of rough drafts where the required fields are already filled in. Admins can then direct authors to specific document ID numbers or naming conventions.
Export
- HTML export most often used so Admins may have an offline copy of their KB
- It's easier to copy the raw HTML rather than the XML when moving KB content to another website...
- An offline copy is available to reference while traveling/ having no access to the internet
- XML export is optimized for search engine use

