KB User's Guide - Documents Tab - Managing Attachments
If yoy haven't yet, begin by adding files to your attachment folder as described in KB User's Guide - Documents Tab - Adding Images and Other Files to Your Documents.
- Attachment folder table structure
- Create a Subfolder
- Delete Images / Attachments
- Zip Images/ Attachments in the KB Admin Tools
- See Also
Attachment folder table structure
Once the Attachment folder is populated, you are presented with a table of helpful information:
- Icon - indicates the type of file extension.
- Name/View - gives you the name of the file, clicking on this link allows you to view the file.
- CopyURL - allows you to copy the filepath of the image to paste into the document editor
- Rename - clicking on this link allows you to rename your file. Remember to manually add the file extension.
- Move - you may move this image into your KB's Shared Documents folder and/or your KB's logo folder.
- Download - clicking on this link allows you to download this document to your browser.
- Delete - Check the checkbox to indicate the file(s) you wish to delete. Click on the Delete Selected button at the bottom of the table to delete your file.
- Size - indicates the size of file.
- Modified (GMT) - indicates the time and date stamp your file was uploaded in Greenwich Meridian Time (GMT).
- In docs - Clicking on the Show link displays document ID numbers in which this image appears. Should the image not be placed in a document, you will see None.
Create a Subfolder
-
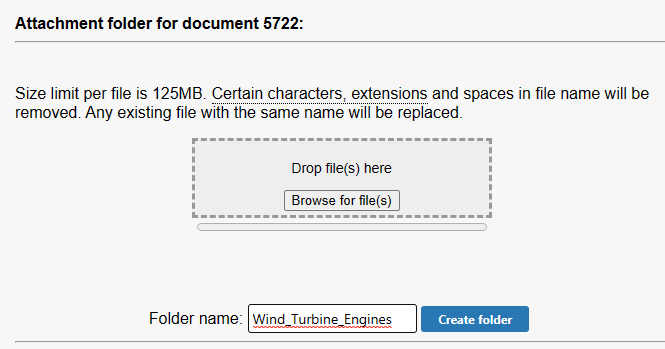
You may create a sub-folder(s) within the Document attachment folder, should you want to organize your attachments by kind, version, etc. Simply click on the link, Open doc XXXXXX attachment folder link. A pop up window will appear with Choose and Upload buttons. Below that, you will see a Folder name: text box. Enter the folder name of your choice there and click on the Create Folder button. The image below shows that the folder, "Wind_Turbine_Images" is about to be created for this KB document, number 5722.

- Multiple sub-folder levels are allowed in attachment folder and there is no limit to the number of levels.
- A sub-folder name character limit exists so the file path can remain efficient.
- As you navigate through the sub-folder structure within the document attachment folder, the updated path will be displayed so you can accurately point to each file location.
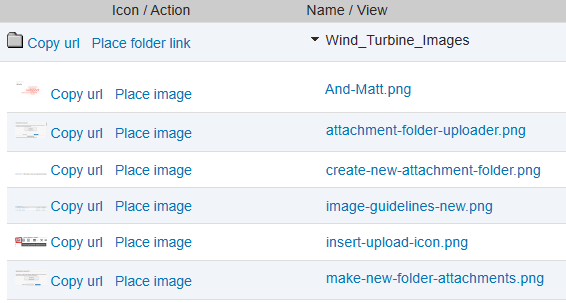
- When viewing the entire attachment folder from the document edit screen, the folder name will appear at the top alphabetically, and you can expand it to see the files placed within that folder.

Delete Images / Attachments
To delete images or files simply click in the check box in the Delete column and then click on the Delete selected button. Or you may click on the the Select all button if you wish to delete all the images and files and then click on the Delete selected button.
Zip Images/ Attachments in the KB Admin Tools
To make a zip file of all or selected images/files, select the images and/or files you wish to zip by either clicking on the check boxes in the Delete column or click on the Select all button. Then click on the Zip selected for downloading button.

A pop up message will appear saying, "A .zip file will be created for you to download. /Click on the OK button to continue.

Once you have clicked on the OK button in the pop up message, a zip file with the file/files you selected will appear in the document attachment folder. The image below shows the document attachment folder for 52053 from our test KB site. The zip file link is circled in red. You may place this *.zip link using the Place file link option in the folder.
The *.zip file's naming standard is, the word Download, plus the date/time/second stamp (e.g. Download20150825182430.zip).

When you place the zipped link in the Body of your document the link will read as Download############.zip, for example: Download20230502185248.zip
To update the link text, click into the linked text and click the Insert/edit link icon and change the "Text to display" field.

