Creating and Managing Microsoft Teams
Table of Contents
- Table of Contents
- Creating a Team
- Channels
- Managing File and Folders
- Moving and Copying Files
- Restricting File Modification
- Managing Access
- SharePoint
- Version History
- Additional Information
Creating a Team
- Open Microsoft Teams either the desktop application or via the web browser (https://teams.microsoft.com).
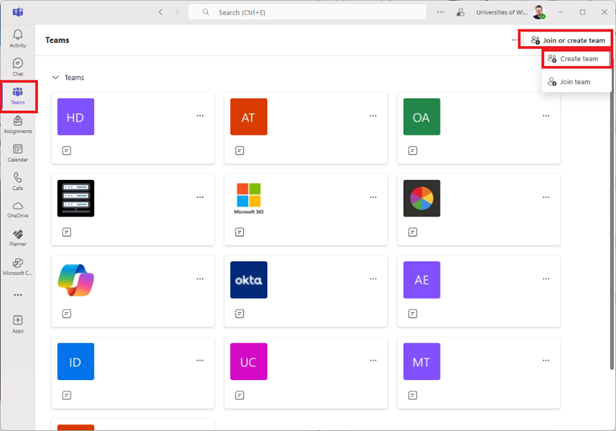
- On the left-hand side click on the tab labeled “Teams”.
- Click “Join or Create a team”
- Click “Create a Team”
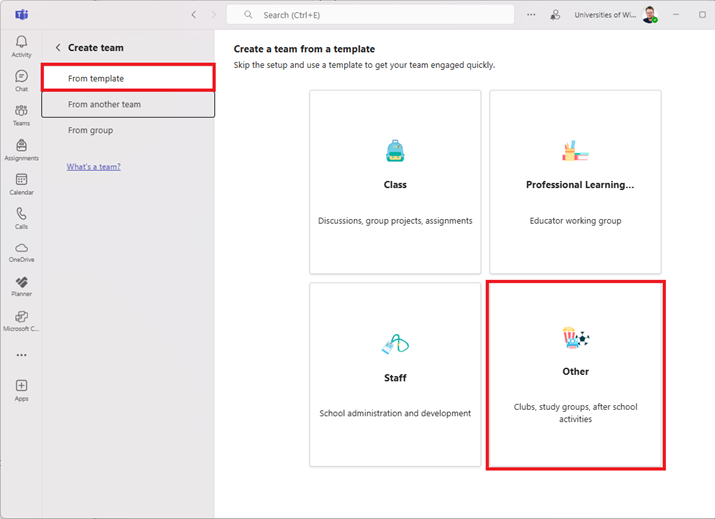
- Select the team type you want to create, for identifying the best choice reference this resource from Microsoft: Choose a team type to collaborate in Microsoft Teams - Microsoft Support. If you are unsure, you can just select “Other”.
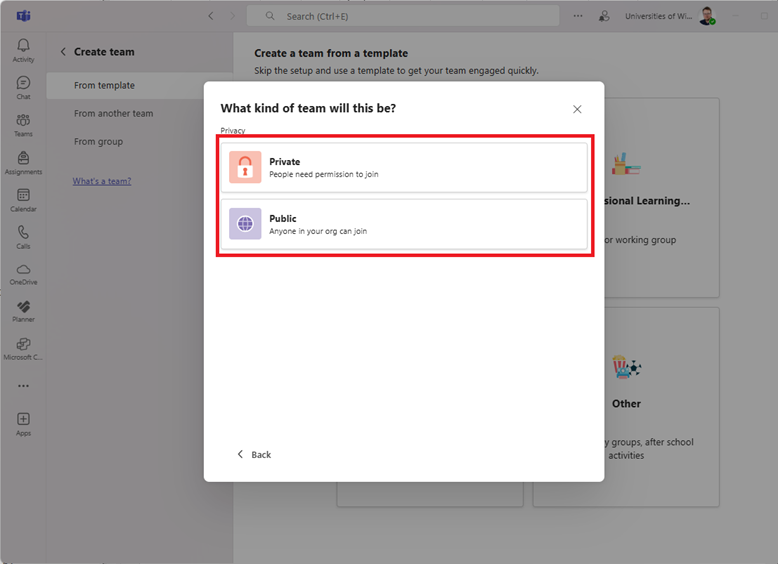
- Select the privacy settings you want the team to have. Either Private or Public.
- Private will be limited to you and limited group you decide.
- Public will be accessible to anyone in your tenant (University of Wisconsin System Administration)
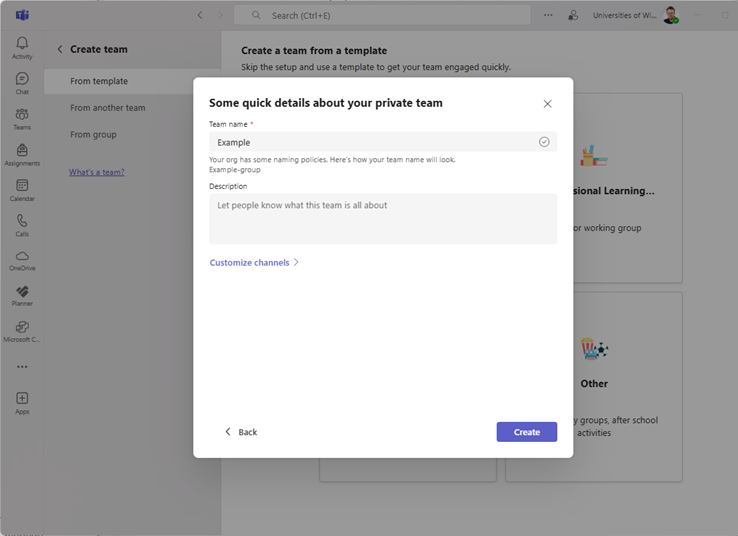
- Provide a name and description for the team.
- After your team is created successfully, you will be prompted to add members to the team. You can add members later if you skip this step.

Channels
Channels are the conversations you have with your teammates around a specific topic, department, or project. Team owners and admins determine which members can create channels.
A standard channel is open to all members, and anything posted is searchable by others. Private channels are best for smaller audiences or a specific project.
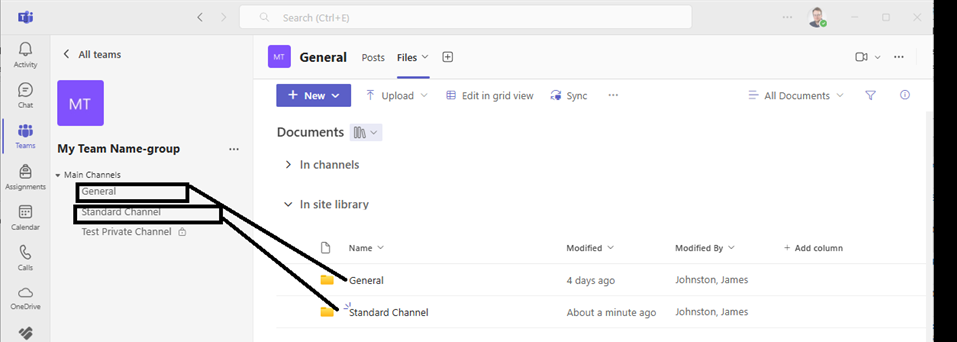
For file management, on the root directory - each folder is associated with it's own channel.
Managing File and Folders
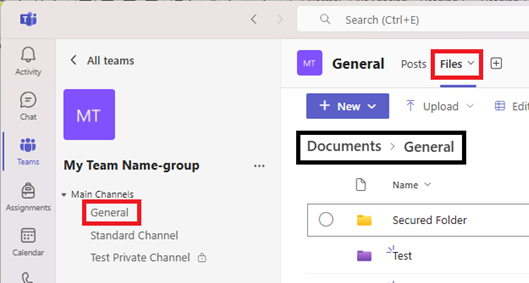
Documents in Microsoft Teams are typically located in the “Files” tab on the top after selecting a channel. Most teams will have “General” as the default.
When you select the "Files" tab your folder destination is determined by the channel you have selected on the left.
The "Documents > General" box provides context for where you are in the file hierarchy.
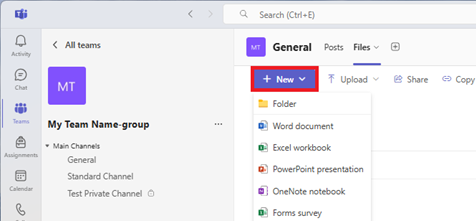
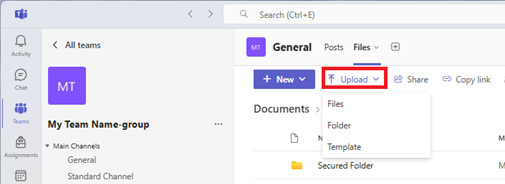
You can create or upload existing files and folders into your team group. For new files: Click the “+ New” button and you can create a new file in place and will immediately take you to working in the new file. Keep in mind you will create a file in the current folder hierarchy shown at the top.
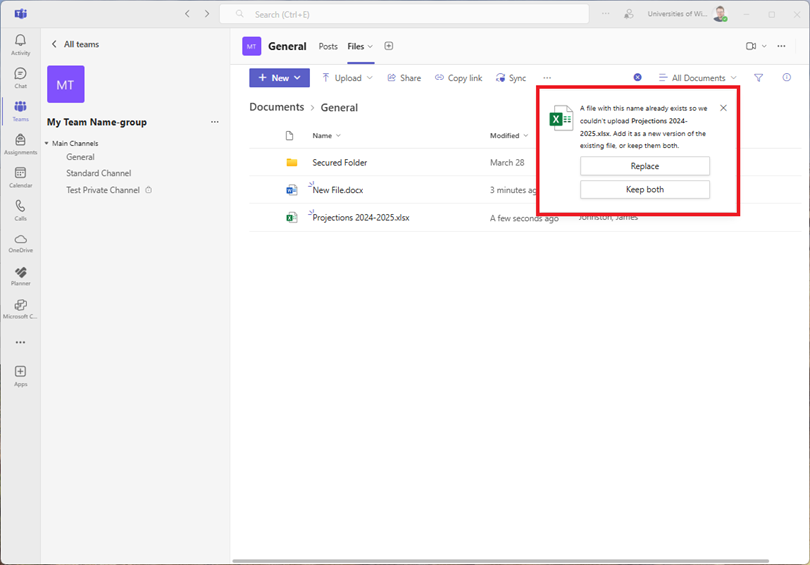
You may receive notifications about your actions in the Microsoft Teams window as you upload files Sometimes it will just display details about what was done such as uploading a file or a conflict you may need to resolve. Make sure to select an action if it requests you to do so.
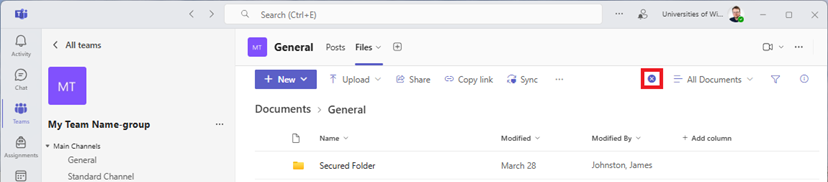
You can access notifications again if they disappear with this button.
Moving and Copying Files
Microsoft Teams lets you easily move and copy files from one location to another; you can even move files across different teams.
For simple operations of moving, you can drag files as needed. It will move a file into the associated folder you drop inside.

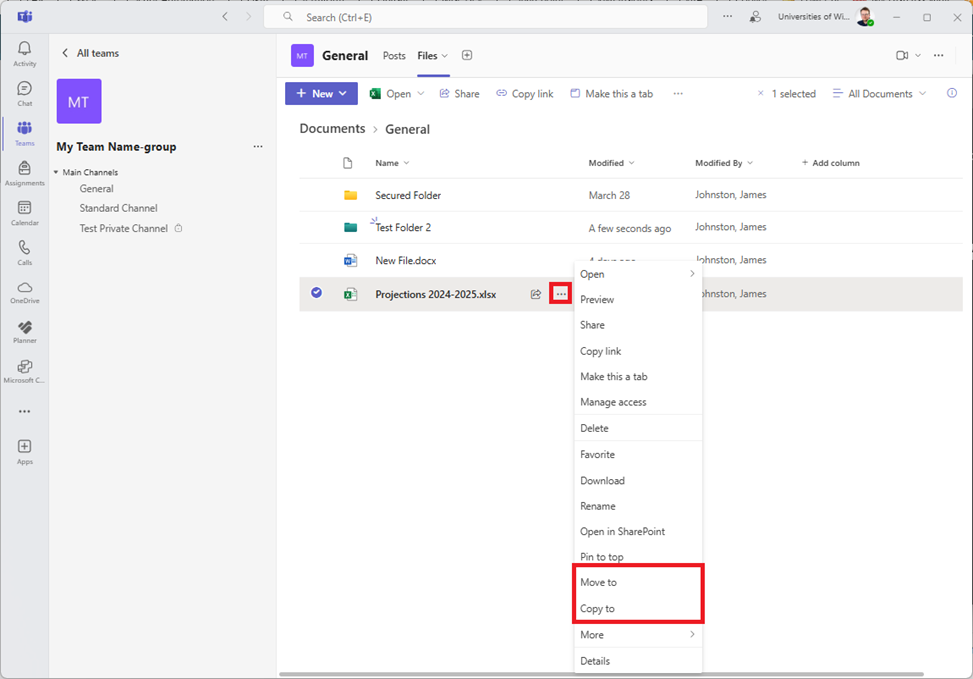
There are context menus to move and copy files and folders if you click on the three dots (…) you will have the ability to select “Move to” and “Copy to”.
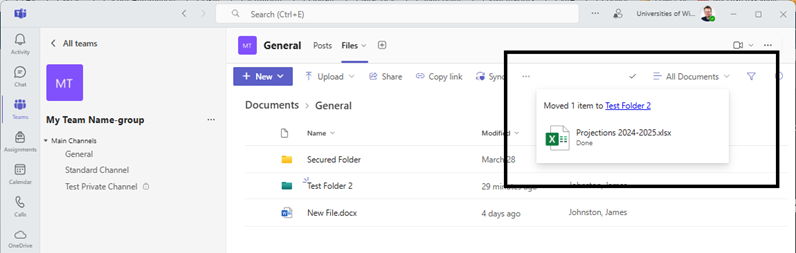
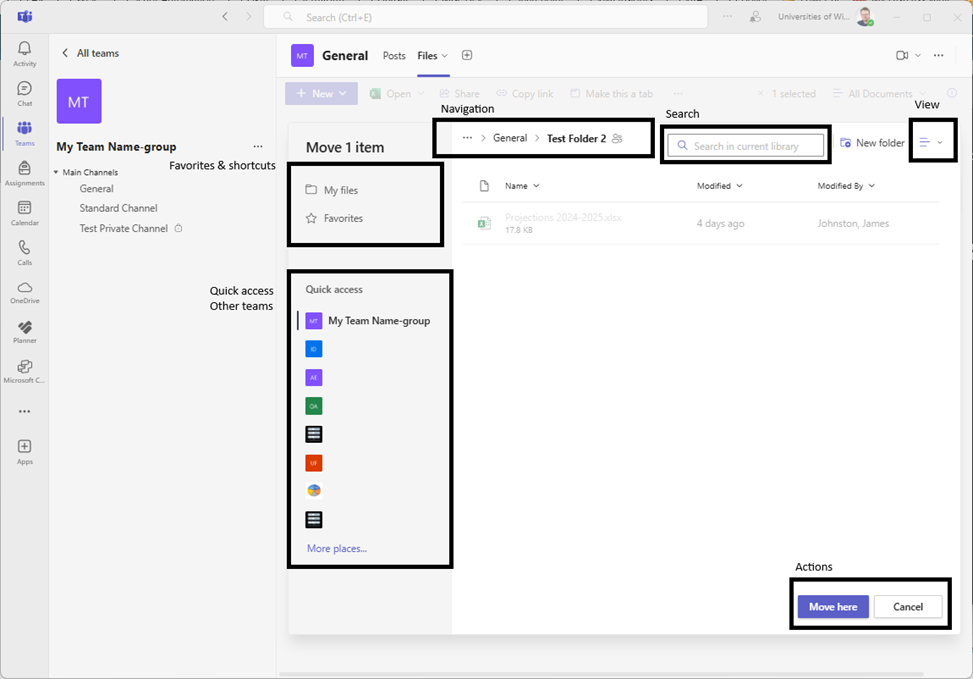
In the window pop-up, navigate to your desired folder via the Navigation section and select the action to “Move here” or “Copy here” depending on what you are trying to accomplish.
See below for a break-down for each section in the context pop-up to move.
Restricting File Modification
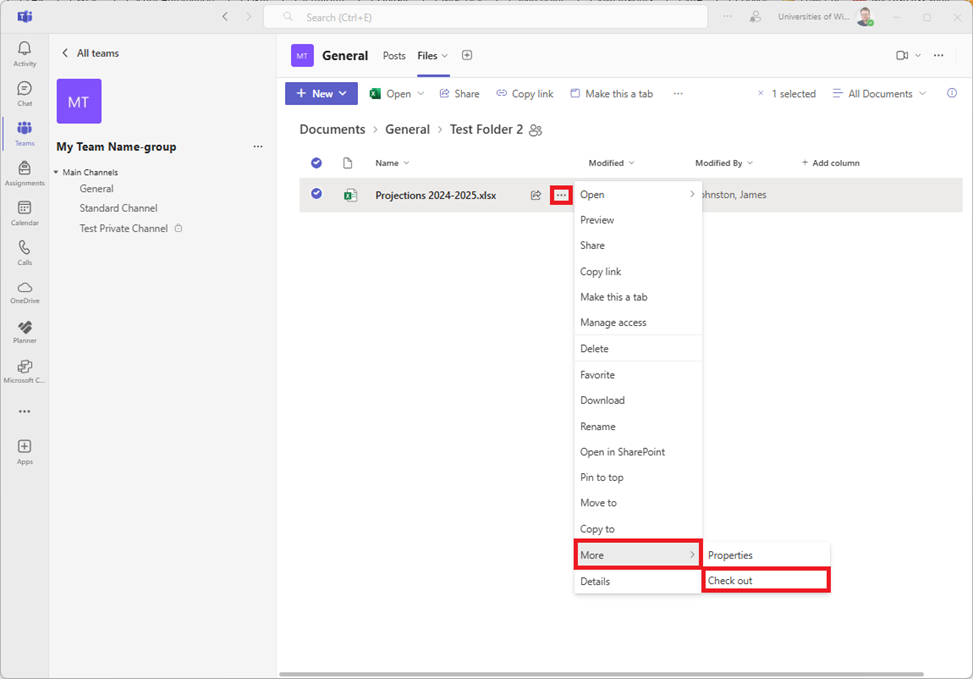
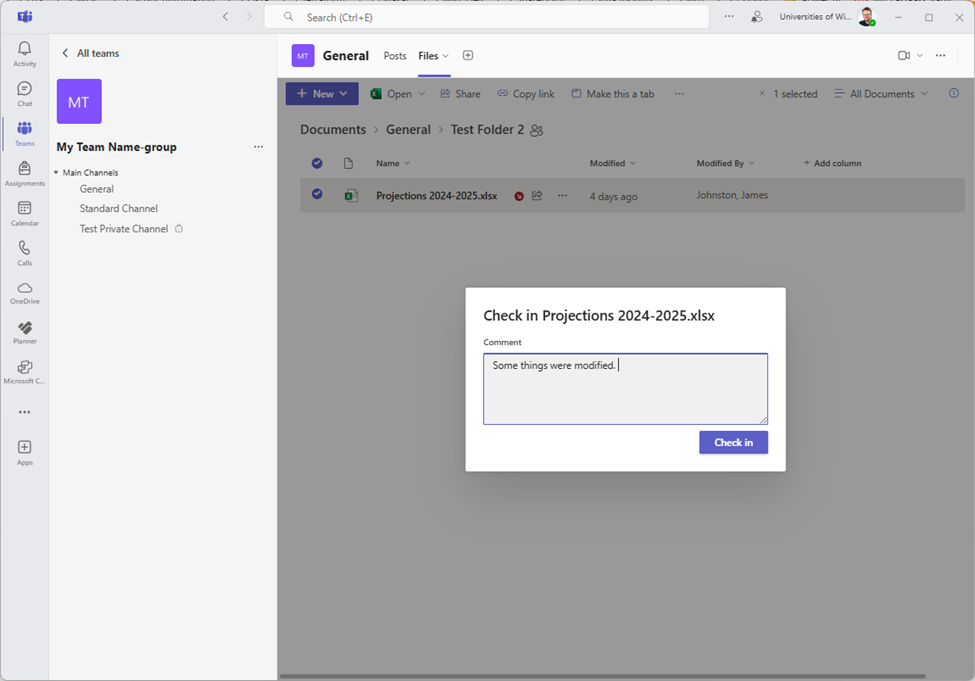
If you want restrictive edits for files, you can utilize the check in and check out features in Microsoft Teams. You can “check out” a file and limit others from making changes until you “check in” the item and provide details about what was changed. You can discard changes and cancel the “check in process”.
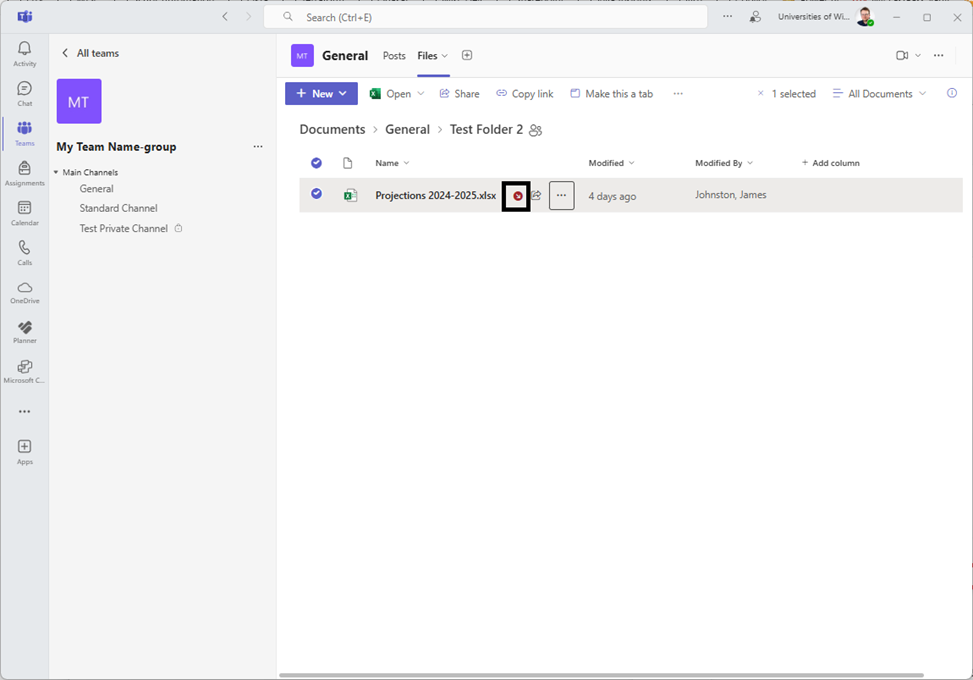
There will be a visual that represents that a file that is currently in the hold of being “checked out”, and prevent a user from engaging with the file until it is discarded or checked back in.
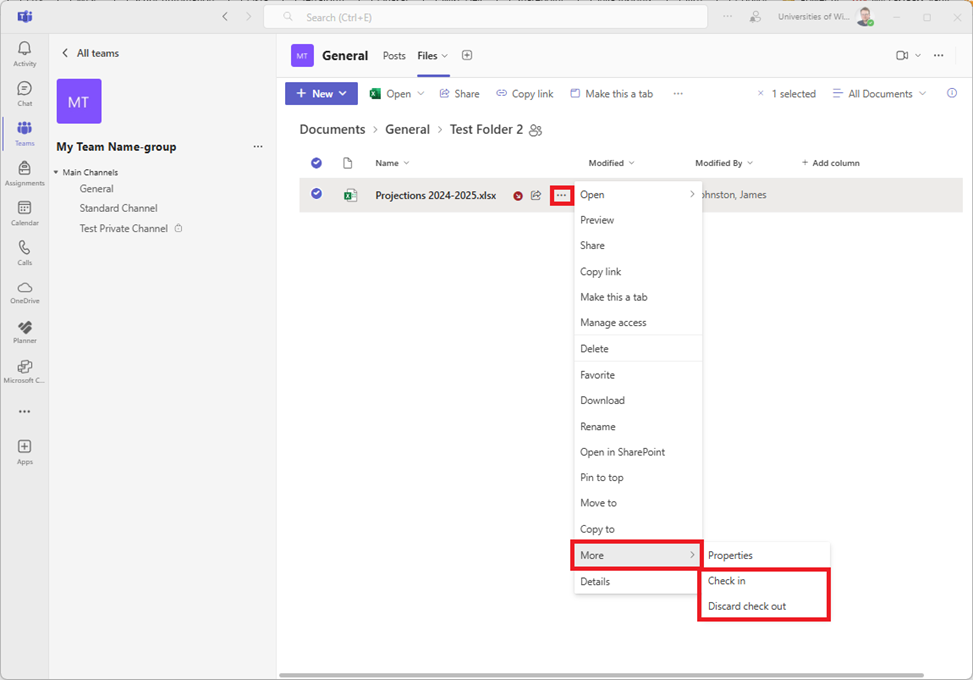
You can select if you want to check it back in or release any edits and discard the check out. If you decide to check a file back in you can fill out details about changes for the file modifications.
Find more about checking files in and out it at Microsoft’s official site: Check out, check in, or discard changes to files in a SharePoint library - Microsoft Support
Managing Access
When files and folders are added into Teams everyone with access to the Team by default can view the file.
Permissions for files and folders are inherited from the parent folder they are inside.
Each role will impact your team site in different ways. A user inside University of Wisconsin System Administration can be a “Owner” or a “Member”, those outside of the organization can only be a “Guest”.
| Role | Description |
|---|---|
|
Owners |
Team owners manage certain settings for the team. They add and remove members, add guests, change team settings, and handle administrative tasks. There can be multiple owners in a team. |
|
Members |
Members are the people in the team. They talk with other team members in conversations. They can view and usually upload and change files. They also do the usual sorts of collaboration that the team owners have permitted. |
|
Guests |
Guests are people from outside of your organization that a team owner invites, such as partners or consultants to join the team. Guests have fewer capabilities than team members or team owners, but there's still a lot they can do. |
For additional information on managing access please review the following information: Team owner, member, and guest capabilities in Microsoft Teams - Microsoft Support
To change the privacy of the team follow these instructions: Make a public team private in Microsoft Teams - Microsoft Support. Regardless of the privacy choice, folder and chat channel permissions can still be restricted individually.
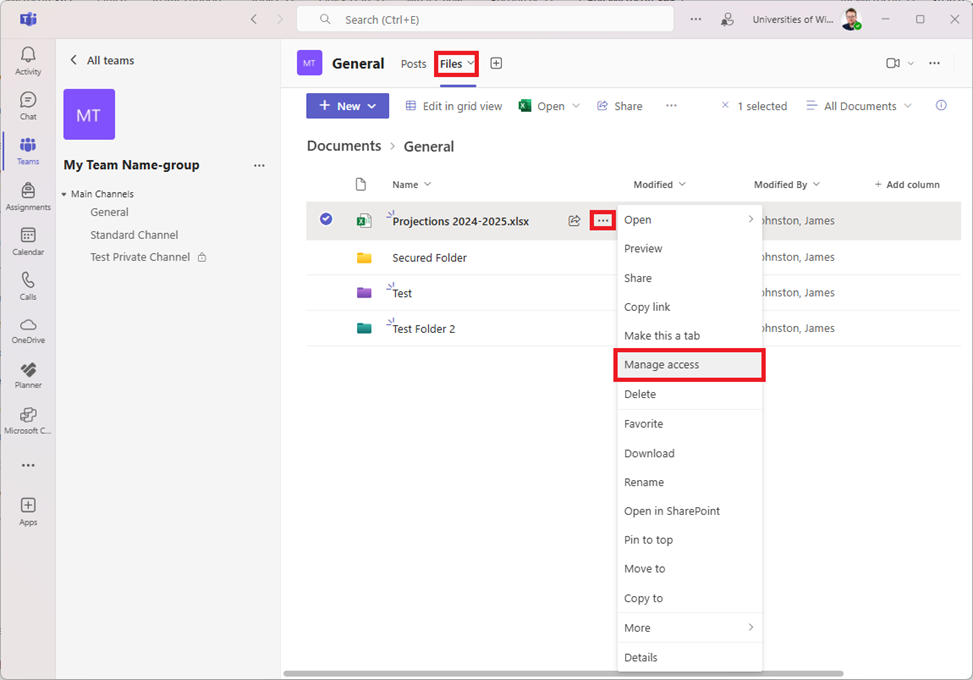
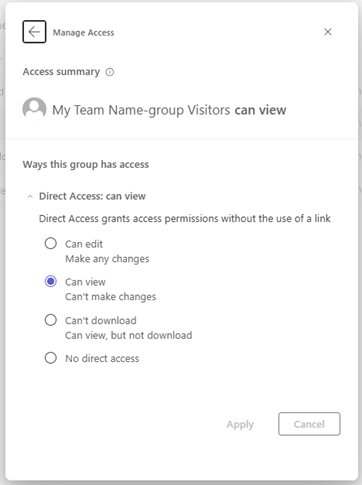
Manage the access of files and folders by going to the “Files” section in the channel you are working with and clicking “Manage Access”.
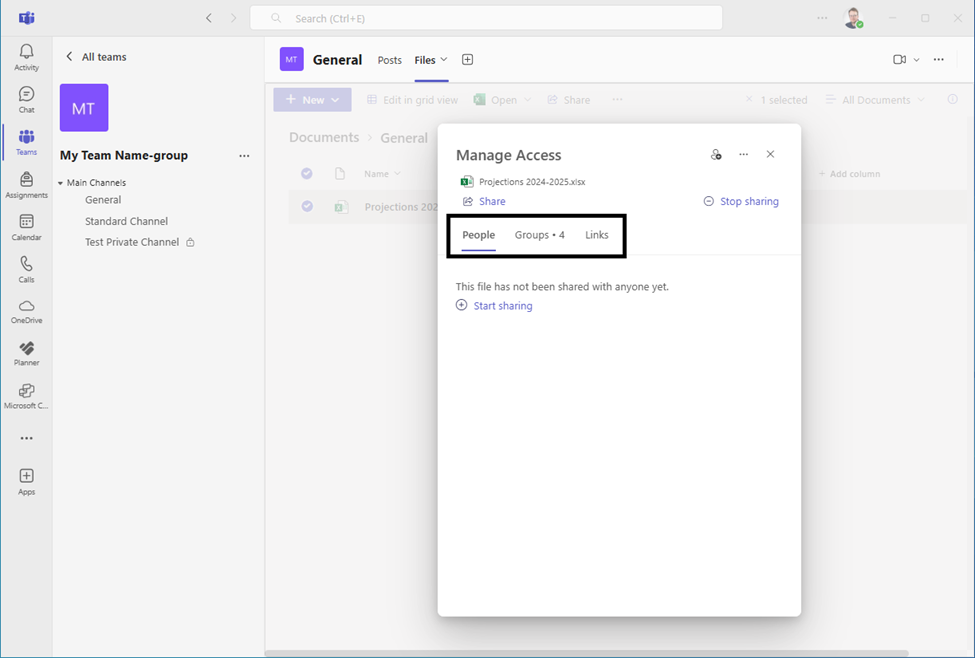
You will see a few tabs; here is a brief explanation of what each tab provides:
- People – specify specific people to share the file with.
- Groups – specify specific groups of people to share the file with (ie: members, owners, guests in the team).
- Links – generate a unique access link to the specified item (either a folder or file) and provide it to individuals, this is useful if you want to share a file or folder in a PowerPoint, etc.
Permissions can be customized for groups that have access to your team (owners, visitors, and members).
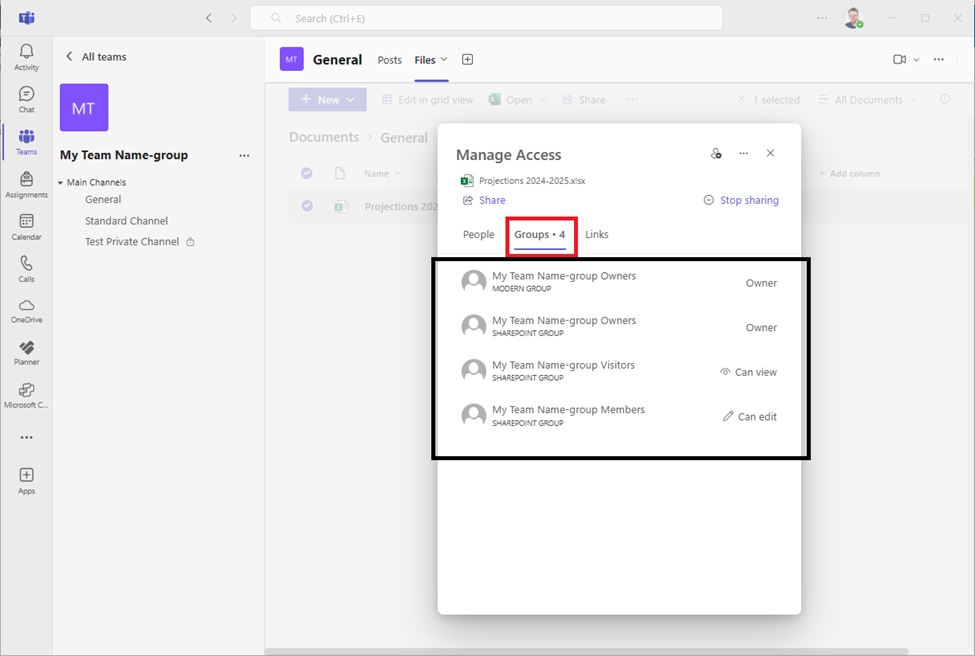
You can refine permissions to make files or folders: viewable, viewable (no download), editable, or no access at all.
SharePoint
You can access the SharePoint version of a folder or file if needed – usually offering more advanced features and access to the version history of files and folders.
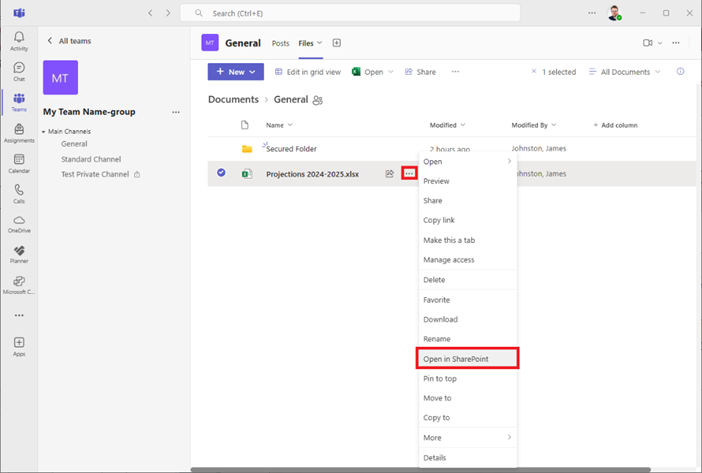
For a file, go to the file itself and click the three dots on the right (…) then “Open in SharePoint”.
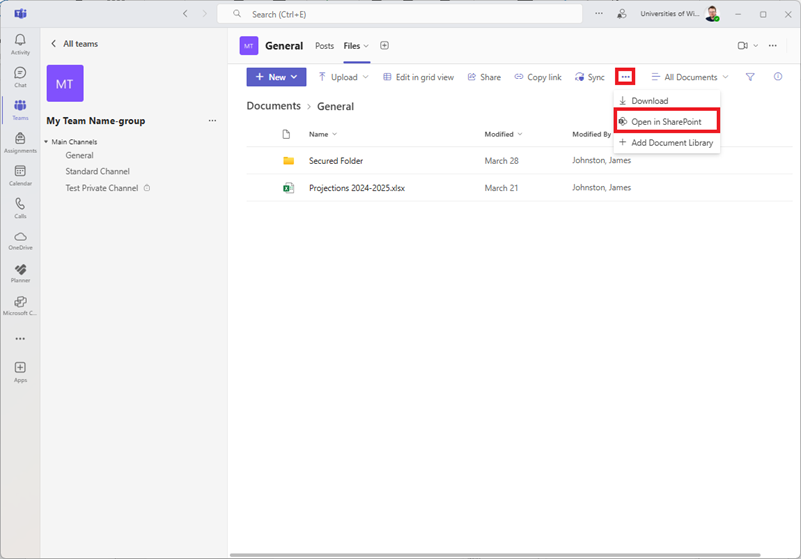
When navigating inside a folder, you can also open the current folder in SharePoint though the option may not show up on the top if there is enough room otherwise if there is not you will click on the three dots on the top bar (…) then “Open in SharePoint”.
Version History
The version history is useful to recover or view different versions of a file that have been modified. You will need to open the item in SharePoint as demonstrated above, then you will have the additional functionality to view the versions of the file itself with the SharePoint’s (…) drop-down menu.
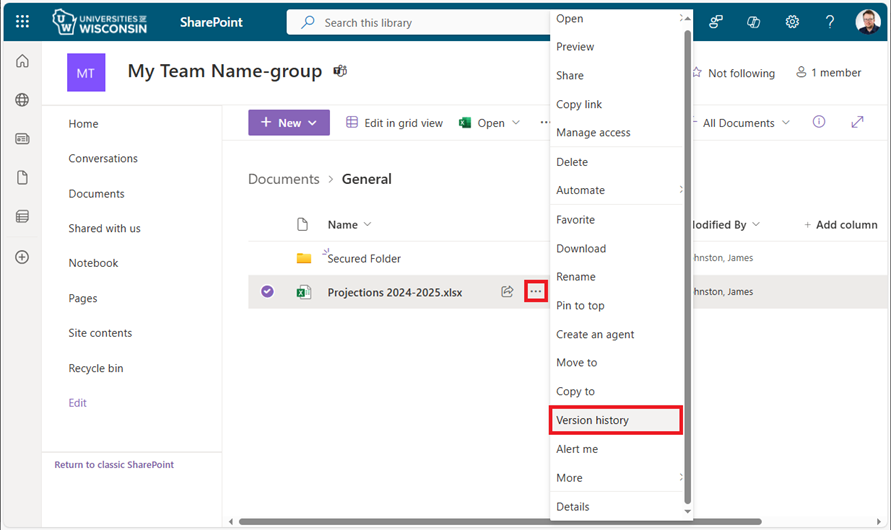
After clicking “Version History” you will be able to see versions of the file that exists.
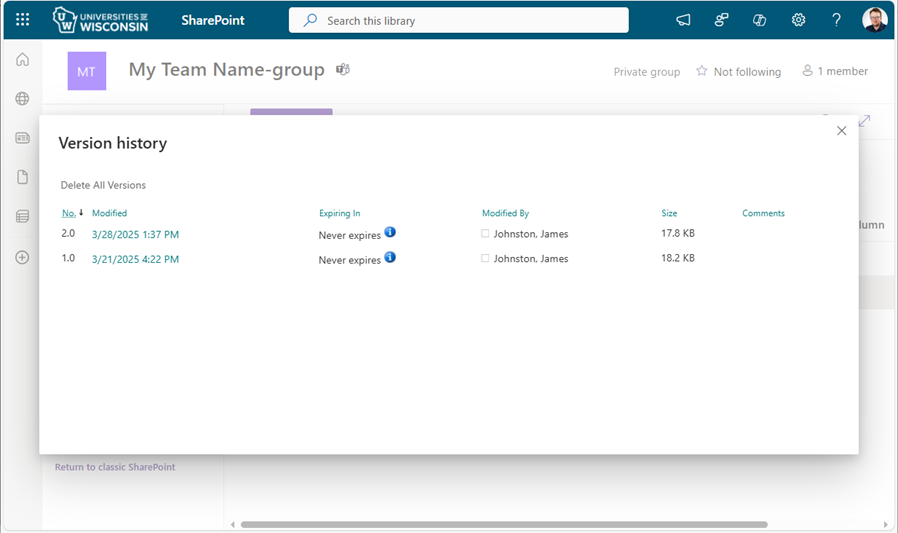
To view a particular version of a file, In the Modified column, click the date link for that version.
Tip: If you want to reinstate an earlier version of the file, you can select the arrow next to the date link, and then select Restore. SharePoint doesn't remove the earlier version you just restored. It creates a copy of it and makes it the latest version in the history list.