(WHS Archives) EAD -- General Workflow [Old]
EAD Workflow [old]
Finding aids created after 2019 should be done in ArchivesSpace.There are still some contents lists which were created before this date, if importing via ASpace table is not possible follow old markup workflow.
Exceptions are Tax Rolls and other tables, which ArchivesSpace does not deal with well.
A. Candidates
This step to be done by Cataloging Archivist (Alison Bridger) or Assistant Archivist (Julia Wong)
- Reviews new finding aids (registers) and additions to finding aids
- Make corrections in Word document or on paper document, and place in Candidates pile
- Finding aids for collections going to SAPF (State Archives Preservation Facility) are noted as such (or as PSF)
- Archivists in charge of collection areas may also add Candidates to this pile if straight forward; otherwise give to Cataloging Archivist for review
- Determine if finding aid is in fact for a new finding aid (if not see Section J. Updates & Corrections)
- Determine file name for new finding aid, write at top of finding aid (see Appendix A. File Naming Conventions)
- Determine how many parts and write below file name
- Place in Enter in PSF Logbook pile
B. Enter in PSF/SAPF Logbook
This step to be done by Assistant Archivist
1. Enter finding aids into Logbook then add to Annotating & Markup pile
SAPF finding aids are recorded in
L:/LIBARC/LIBARC SHARED/Archives Cataloging and EAD/EAD/EAD Stats/PSF EAD Logbook
Non-SAPF finding aids are recorded in
L:/LIBARC/ LIBARC SHARED/Archives Cataloging and EAD/EAD/EAD Stats/Non-PSF EAD Logbook
C. Annotating & Markup
Finding aids are ready to markup, to be worked on by an Assistant EAD Archivist, Assistant Archivist, EAD Intern, or Cataloging Archivist. While working on cleanup and markup, keep in personal box. When finished with markup add to Review pile
1. Clean-Up prior to Markup
- Review paper finding aid
- Are there are any outstanding questions that need to be resolved?
- Does anything need to be verified with a stack check?
- Are there are any errors that need to be corrected in the electronic Word copy?
- Annotate paper finding aid to make markup easier
- Mark hierarchical levels in contents list, to correspond with <c> levels
- Highlight titles of published works; look for double-quotes, underlined or italicized words and phrases
- Label abstract, scope & content note, and biographical/organizational note if not clearly labeled
- Look for the source of acquisition note, see 541 or 561 in the catalog record, if not in the finding aid
- Compare register and catalog record: Title, author (if applicable), quantity, dates, abstract, etc. Resolve any discrepancies and make corrections to register, as needed. Corrections to catalog records may be added to Cataloging Corrections pile or bring to the attention of Cataloging Archivist
- Check for restrictions in catalog record (506 and 540); leave out statements about unprocessed collections or collections held at ARCs.
- Mark lists, tables, notes, accent marks, and other out of the ordinary tags.
- Spell out known abbreviations
- Spell out first instance of known acronyms
- Make sure dates follow DACS format for dates of materials in contents list and are understandable and in consistent order throughout the rest of the finding aid
- Look for material that should be separated out from the <bioghist> as appendices (for example, lists of correspondents, publications, abbreviations, etc.); determine if these should be in table format [rare].
- Open document in Microsoft Word
- For processed finding aids:
- L:\LIBARC\LIBARC SHARED\Registers
- Sorted hereunder by
- Mss (alphabetically, with separate WCFTR folder)
- Local (by call number)
- State (by call number)
- Audio (link to audio lists)
- VisMat (by call number, with Architectural & Moving Images folders)
- For unprocessed finding aids:
- L:\LIBARC\LIBARC SHARED\Accessions
- Sorted hereunder by Mss, Local, and State, and hereunder by year; additional folders for Audio (by call number) and VisMat (with folders Moving Images & Photo lists)
- “Save As” a text document
- Save in the following folder:
- L:/LIBARC/LIBARC SHARED/Archives Cataloging and EAD/EAD/EAD New/Text Files
- Save as a Plain Text (*.txt) document.
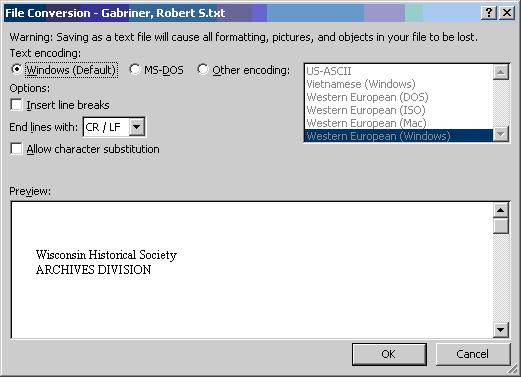
- The following window may open, keep as Windows (Default)
- Save often!
- Click on the ¶ (paragraph symbol) on the toolbar, this will display formatting symbols to make editing easier
- Delete title page and table of contents, if either is present
- Look at the paper finding aid carefully, if any corrections or changes have been made to the finding aid, make these corrections now
- Run “EADmacro”
- Close and re-open the .txt document
- Go to View/Macros/View Macros
- Select “EADmacro” from list and select “run”
- Macro will convert non-XML characters to the appropriate entity codes, convert most variations of “n.d.” to “undated” and “ca.” to “circa,” and clean up some formatting issues
- While the macro should take care of these things, keep an eye out for them since the macro does not catch these 100% of the time
- Save file
- Do not run the macro more than once!
- If the series titles appear in uppercase in the contents list, change from all caps to title case
- To change all caps to title case, highlight the series title, and from the Font toolbar select “Aa” and choose “Capitalize Each Word”
- Repeat for each series title in all caps
- Change words that should not be capitalized to lowercase, such as “of” and “and” (for example, Speeches and Statements of Daisy Bates, Reference and Subject Files)
- No need to convert series titles from all caps that are repeated at the tops of pages, followed by cont. or continued as these instances will be deleted
- Highlight the contents list and copy (Ctrl + C)
- Save and close file
- Open a new Word document and paste (Ctrl + V) the contents list into it
- Save as a Plain Text (*.txt) file in L:/LIBARC/LIBARC SHARED/Archives Cataloging and EAD/EAD/EAD New/Text Files, with the same file name plus "_contents list" at the end (for example if the finding aid is saved as "American Federation of Labor," the contents list should be saved as "American Federation of Labor_contents list").
2. Container List CleanupNote: There are some contents lists that are in tables, see instructions for markup of tables in Appendix K. Converting Excel Tables to EAD
Note: It is very important to complete steps a-d in the correct order. After that, steps can be combined or completed in any order that works best
- Reveal formatting marks if not already visible, ¶ (paragraph symbol) on the toolbar
- Delete every instance of a series title/heading followed by "cont." or "continued," generally appearing at the top of each page in the contents list; newer contents lists do not have these
- Delete any spaces or tabs preceding series titles or headings so that they are flush with the left margin
- Usually anything without a container number in front of it
- There may also be tabs that were put in using the auto-indenting feature in Word, these will appear indented but will not have a tab mark
- To get rid of auto-indents, backspace until the hard return preceding the auto-indent is gone and then re-enter the hard return
- Run the "ABLcontainerlist" macro by going to View/Macros/View Macros
- Select “ABLcontainerlist” from list and select “run”
- Macro will clean up some tabbing issues in preparation for Auto Box List, delete headings such as "Container List" and "Box/Folder"
- While the macro should take care of these things, still keep an eye out for them since the macro won’t catch these 100% of the time
- Save file
- Do not run macro more than once!
- Fill in missing box numbers
- If auto numbering was used, formatting will need to be cleared
- Select all of the text Ctrl + A then on the Home tab in the Font group click Clear Formatting, upper right icon with Aa with an eraser
- The numbers will remain but will not change automatically as numbers are added and/or deleted
- Add and delete tabs and spaces so that each line in the finding aid meets the following criteria
- There is one tab between the box number and folder number
- There are two tabs between the folder number and folder title.
- If there are no folder numbers make sure there are two tabs between the box number and the folder title.
- All other paragraph breaks and tabs must be deleted from the line
- With longer titles the text will appear to the far left under the box number, this is fine, as long as the paragraph break does not appear until the end of the folder title
- Look out for auto-indenting!
- Delete any stray tabs and paragraph breaks, taking special care to reunite long folder titles that have been split onto two lines by tabs and/or paragraph breaks.
- Check for instances with “C.” as part of a name or other abbreviations that may have been changed to “circa”; as well as “N.D.” changed to “undated”
- Remove headings such as “Note:” or “Physical description:” these will be added with the style sheet when the appropriate tag is used
- Save the document as .txt file
- Now move on to markup!
3. Choosing a Markup Method
Markup the contents list using one or both methods. Depending on the length and complexity of the finding aid, one method may be preferable to the other. Each option is explained below.
A general note on marking up the contents list: make sure that there are no stray spaces/tabs inside or outside of the tags; otherwise the Final Clean-up clip may not work properly.
Option 1: Markup a contents list manually when the finding aid is complex, and for which use of Auto Box List is not an option. Manual markup is best used in combination with Auto Box List (for example lines, such as series, sub-series, and headings, that do not begin with a box number) or for contents lists/sections of contents lists that vary from the formatting required by the Auto Box List function.
For more details, see Step 4. Manual Markup for procedures
Option 2: Use Auto Box List for contents lists, or sections of contents lists, that consist primarily of box and folder lists. Auto Box List is generally the fastest method for marking up a contents list.
For more details, see Step 5. Auto Box List for procedures
For the Auto Box List feature to work, the section MUST meet these criteria:
- The contents list must be formatted in accordance with step 2. Container List Cleanup
- Each line must start with a box number
- After the box number, the next piece of information on the line must be either a folder number or unit title
- Each line must consist of a box number, folder number (optional), unittitle, and/or unitdates, ending with a paragraph break (in that exact order)
4. Manual Markup
- Refer to annotated copy of the register to help with markup.
- Open NoteTab Pro
- Open container list .txt file
- Markup series at the <c01> level
- Highlight the first line in the contents list, highlighting only the text and not any spaces before or after the text
- The first line in the contents list is usually <c01> level and is generally a series title; collections with more than one part, the first level in a contents list is usually <c02>
- Double-click on <c01 level=”series”> clip, the first element in the "Container List" section in the EAD Cookbook 2002 menu on the left side of the screen
- Highlighted text will be wrapped in the tags appropriate for marking up a series at a <c01> level
- Ignore the location of the </c01> tag, this should be corrected by the Final Clean-up clip
- If there is a date, highlight the date, being careful to include only the date and not any extra spaces or punctuation, and double-click on the <unitdate> clip
- Markup series/heading at the <c02>, <c03>, or <c04> level
- Highlight the heading or series title
- Double-click on the <c02><unittitle> clip (or the appropriate <c> level)
- This clip works best for series titles and headings that consist only of a <unittitle> and <unitdate> between the <did> tags
- If there is a date, highlight the date, being careful to include only the date and not any extra spaces or punctuation, and double-click on the <unitdate> clip
- If there is more than just the <unittitle> and <unitdate> tags between the <did> tags, use the <c02>, <c03>, etc. clips, as explained in step f
- Markup complex series/headings
- Highlight the heading or series title
- Double-click on the <c02> clip (or the appropriate <c> level)
- Manually enter or highlight any tags that occur between the <did> tags, including the <unittitle> and <unitdate> and any other tags specified in the annotated markup, such as <unitid>, <physdesc> and <note>
- Markup folder titles/units
- Container level always begins with a container number, whether it be for a box, folder, reel, volume, etc.
- Highlight the entire line describing the unit (generally starting with a container number and ending with a brief description or title of the unit
- Double-click on the appropriate <c01>, <c02>, <c03> clip, this will place the entire line between the appropriate <c> level and the accompanying <did> tags
- Highlight the first data element (this should be a container number of some sort) in the line
- Double-click on the appropriate container type tag from the clip library (for example <container type="Box"> or <container type ="No.">)
- Repeat step for each container number/type in the line.
- Highlight the unit description (including any dates). Click on the <unittitle> clip
- If the <unittitle> contains dates, highlight these and click on the <unitdate> clip
- If there are additional data elements describing the unit (for example <unitid>, <note>, or <scopecontent>), highlight the data element and use the clip library to wrap the data in the appropriate tags
- Make sure that the tags are nested properly; the following tags fall between the <did> tags: <unitid>, <container>, <unittitle>, <unitdate>, <note> and <physdesc>; while the following tags fall outside the </did> tag but before the </c> tag: <scopecontent>, <accessrestrict>, and <userestrict>
- Repeat the above steps for each series, heading, and unit listing in the contents list. Most of the tags needed to markup the contents list are saved as clips in the Container List section of the clip library
- To see explanations of each of these clips, see Appendix E. Quick Reference to EAD Cookbook 2002 Clip Library
- In most cases, a combination of the Auto Box List functions and manual markup will be used; procedures for marking up a finding aid using Auto Box List can be found in Step 5
- Save when finished marking up the contents list [Note: NoteTab Pro will not allow saving (the "save" button will be grayed out) if no changes have been made to the document since the last save.]
5. Auto Box List
6. Mark Up of Front Matter
- Make sure that all of the following criteria have been met; if one or more of the criteria has not been met, the auto box list feature will not work; instead, markup the parts of the contents list that do not meet the criteria by hand
- Each line starts with a box number (except for lines consisting of series titles or headings)
- After the box number the next piece of information on the line is a folder number or unittitle
- Each line must consist of a box number, folder number (optional), unittitle, and unitdates (optional), ending with a paragraph break (in that exact order)
- Use annotated copy of the finding aid refer to during auto box list process.
Note: Once comfortable with Auto Box List, it is generally easiest to markup all of the box/folder listings first and then go back and do the series and headings, or vice versa.
Use Manual Markup Procedures under step 4 for lines that do not meet the Auto Box List criteria outlined in step a, such as series and headings.- Markup box and folder list using SelectedBlock
- Highlight all consecutive lines that are at the same <c> level
- Double-click on the SelectedBlock clip under the Auto Box List section of the clip library.
- A pop-up box will appear,sSelect the appropriate <c> level from the drop-down menu
- Leave the "level attribute" as "file" unless the annotated register says to change it to something else
- Select OK
- After a few moments (or longer if these is a very long list of lines at the same <c> level), each line will appear marked up within the appropriate tags
- All of the tags will be strung together, this is okay; it will be fixed when the Final Clean-up clip is run
- If there is a <unittitle> that consists solely of dates, highlight the dates and click on the <unitdate> clip
- Markup box and folder list using CurrentLine
- As an alternative to the SelectedBlock clip, use the CurrentLine clip, which functions slightly differently but generates the same markup
- In general, the CurrentLine clip is best used when there is only one line at a particular level
- With the CurrentLine clip, do not highlight the text, instead click anywhere in that line so that the cursor is on the line to markup
- Click on the ResetLevels clip
- SetLevelInfo, a pop-up box, allows a "reset" of the component number and level attribute
- Select the appropriate <c> level
- Leave the "level attribute" as "file" unless instructed otherwise
- Select OK
- This will set the <c> level and file attribute until the ResetLevels clip has been changed, or if the SelectedBlock has been run
- Double-click on the CurrentLine clip, tt will generate the appropriate tags for the line where the cursor resides
- Repeat for each box/folder listing in the contents list
- In some cases, tags will have to be added that Auto Box List is unable to generate, most of the tags needed to supplement are clips in the Container List section
- In most cases, a combination of the Auto Box List and Manual Markup will be used
- Save when finished marking up the contents list
- Delete the temp file linked to the EAD document (it has the same file name as the EAD file, with "TEMP" at the end), this was created as a working file by the auto box list process and is no longer needed
- Open the cleaned up version of the narrative (front matter) in Microsoft Word. This should have been saved to (according to step C.1.d): L:/LIBARC/LIBARC SHARED/Archives Cataloging and EAD/EAD/EAD New/Text Files
- Open catalog record in Forward or Alma
- Open NoteTab Pro
- Turn on Word Wrap (Ctrl+W)
- Select New EAD under Files in EAD Cookbook 2002; a new window should appear.
- Select type of collection:
- One part:
- Processed Personal Papers (Mss)
- Processed Organizational Records (Mss)
- Processed Organizational Records (Public Records) – Local and State
- Processed Family Papers (Mss)
- Two or more parts:
- Combined Personal Papers (Mss)
- Combined Organizational Records (Mss)
- Combined Organizational Records (Public Records) – Local and State
- Combined Family Papers (Mss)
- Select OK
- Copy and paste, to reduce typos, pertinent parts into template from the Word document and the catalog record
- Take special care to match the formatting to the examples provided
- Mandatory fields are preceded by an asterisk (*)
- All other fields are optional but should be completed whenever information is provided
- *File name (Mandatory): follow naming conventions indicated in Appendix A.
- Creator (Mandatory when a creator(s) is listed): copy exactly as it appears in the author/creator field in the catalog. Include dates if given (see note 2 on dates below). Do not punctuate with a period at the end (nor leave empty spaces for death date).
- Example: Davidson, James D. (James Dorman), 1810-1882
- Note 1: If more than one creator is listed (rare), add manually after template is completed.
- Note 2: Include birth and death dates for creators if they are included in the finding aid, even if they are not included in the 1xx filed in the catalog record.
- *Title of Collection (Mandatory): in some cases the title in the catalog record and/or register will simply be "Papers" or "Records." If so consult with Cataloging Archivist to fix title to meet current descriptive standards. If there is no author/creator, simply use the title field as is, minus the dates. For government records with a period present within the creator name, use a colon to divide the creating office from the designated series title, for example "Wisconsin. Governor: Pardon Papers"
- *Inclusive Dates of Collection (Mandatory): at least one date needs to be entered. Transcribe dates as given in the register. Do not use dates in the catalog as these dates might include dates not covered in the processed register. Do not punctuate with a period at the end. Some editing of dates after template is completed may be required.
Examples:
- One date range (e.g. 1936-1980)
Enter "1936" into first box.
Enter "1980" into second box.- Two date ranges (e.g. 1936-1980, 1982-1984)
Enter "1936" into first box.
Enter "1980" into second box.
Enter "1982" into third box.
Enter "1984" into fourth box.- Single date (e.g. 1936)
Enter "1936" into first box.- Two single dates (e.g. 1936, 1980)
Enter "1936" into first box.
Enter "1980" into third box.- One date range, one single date (e.g. 1936-1980, 1987)
Enter "1936" into first box.
Enter "1980" into second box.
Enter "1987" into third box.- One single date, one date range (e.g. 1984, 1987-1990)
Enter "1984" into first box.
Enter "1987" into third box.
Enter "1990" into fourth box.- *Physical Description (Mandatory): Copy physical description (typically cubic footage followed by a breakdown of container types and other formats not included in cubic footage) as it appears in the register. For multipart collection copy information from catalog. Do not punctuate with a period at the end.
- Example: 4.2 cubic feet (7 archives boxes, 2 flat boxes, and 7 volumes), 4 tape recordings, and 499 photographs
- *Main Call Number (Mandatory): Copy main call number (usually the first one listed) as it appears in the register. Enter call numbers using initial capital letters only (e.g. Mss 345 not MSS 345). (Only Wis and U.S. are abbreviated; spell out other initial elements such as "Illinois".)
- Example: Wis Mss TU
- Example: Mss 49
- Example: Series 2501
- Additional Call Numbers: If there are additional call numbers, begin the line with a semicolon, followed by a space, followed by the additional call number. Repeat for each subsequent call number.
- Example: Mss 419; PH Mss 419; Audio 1319A
- * OCLC Number (Mandatory): Copy first OCLC number from catalog. Include the "ocn" or “ocm” prefix for OCLC numbers. If no OCLC number appears in catalog see Cataloging Archivist.
- Example: ocn 145775675
- ARC Name: If the collection is housed at an Area Research Center (ARC), enter the name of the ARC as it appears in the catalog record. If it is an ARC collection, the location above the call number will give the name of the ARC.
- For example, if the catalog record reads:
"Wisconsin Historical Society Archives
Oshkosh Area Research Center
Dodge Series 49 OSH CAB 3"
then enter: Oshkosh Area Research Center- *Located in Madison? If all or part of the collection is housed in Madison, enter a "Y". If not, enter "N". To determine if a collection is housed in Madison, look at the catalog record. If any of the following locations are listed, enter a "Y":
Historical Archives Accessions
Historical Archives Main Stacks
Historical Archives Sound Holdings
Historical Archives Visual Materials Holdings
Historical Library Microforms
Historical Archives/WCFTR Film Collections- Arrangement Note: If the register or catalog record contains a note describing the overall arrangement of the collection, copy and paste it here. In the catalog record, it will appear after the heading Arrangement (generally after the Physical Details). It may appear in various places in the register. Generally, however, there will not be an arrangement note.
- Donor Statement. If the register or catalog record contains a donor statement, copy and paste it here. The statement will often begin with the phrase, "Presented by," followed by the name of the donor, as well as the location of the donor and the date it was donated. The donor statement should follow this model: Presented by Name Of Donor, City, State, Date.
- Example: Presented by John Smith, Madison, Wisconsin, 1985.
- Accession Numbers. Include accession numbers, listed in the register or the catalog record (see Staff display in MARC). Separate accession numbers with a comma and a space.
- Example: M83-49
- Example: M83-49, M90-113, MCHC84-32
- Processor Information. If the register includes the name of the processor, include along with the date it was processed. Generally this will appear on the first page of the register, preceded by the phrase "Processed by." In many cases, the processor’s initials will be included but not their full name. Include their full name if known or ask the project manager what the full name should be.
- Example: Processed by Carolyn Mattern, 2001.
- Example: Processed by Joan Hamilton, 1981, and Carolyn Mattern, 1992.
- Related Material. Sometimes the register or catalog record will include a statement about related materials. Copy and paste this statement into the template. Use the statement included in the register if one exists; if not, use the statement included in the catalog record.
- Example: Microfilmed probate case files are also available at the Dodge County Register in Probate Office, Juneau, Wisconsin.
- Example: Printed Proceedings (Green Series 1) and Board Proceedings and Papers (Green Series 4) contain related records.
- *Restrictions? Y or N. Mandatory. Enter "Y" for yes there is an access or use restriction to be entered in the "Access Restrictions" or "Use Restrictions" field in the template. Enter "N" if there are no restrictions to be entered.
- Access Restrictions. Copy and paste any access restrictions included in the register or catalog record (do not retain the word "Restricted" which often appears at the beginning of the access restrictions statement). Use whichever is most complete. Access restrictions appear in 506s in the catalog. Access restrictions record information about restrictions imposed on access to the collection, including legal, physical, or procedural restrictions imposed on individuals wishing to view part or all of the collection. Do not add access restriction about collection being held at an ARC, as this information is provided elsewhere.
- Note: If an access restriction has been entered make sure that the "Restrictions" field contains a "Y".
- Example: Access is to reference prints only. Consult Visual Materials Curator regarding access to negatives.
- Use Restrictions. Copy and paste any use restrictions included in the register or catalog record (do not retain the word "Restricted" which often appears at the beginning of the use restrictions statement). Use whichever is most complete. Use restrictions appear in 540s in the catalog record. Use restrictions record information about the terms governing use of the materials after access has been provided; these might include copyrights, film rights, and restrictions on reproduction.
- Note: If an use restriction has been entered make sure that the "Restrictions" field contains a "Y".
- Example: Literary and performance rights reside with the executors of the Blitzstein Estate. Recordings presented by Eric Gordon (Audio 761A, 763A, and 764A) may be used for research only.
- Double check work, looking for typos and formatting errors. Select OK.
- Copy and paste the abstract from the narrative into the Abstract box. Do not include the header "Abstract." If the register contains an abstract, use this one unless told otherwise by the project manager. If the register does not contain an abstract, use the abstract in the "Summary" field of the catalog record (520). The abstract can only be one paragraph so if longer than one paragraph see Cataloging Archivist. Select OK.
- Copy and paste the biography/organizational history from the narrative into the Biography/Organizational History box. Do not include headers such as "History." If the register does not contain a biography or organizational history, leave the text box blank. Select OK.
- Copy and paste the scope and content note from the narrative into the Scope and Content Note box. Do not include headers such as "Scope and Content." If the register does not contain a scope and content note, leave the text box blank. Select OK.
- The template will automatically generate a new EAD document with the markup for the narrative. However, there are a couple clean-up steps that need to be performed:
- Make sure that each paragraph in the <bioghist> and <scopecontent> tags are tagged with opening and closing <p> tags. To wrap each paragraph in <p> tags, highlight each paragraph (make sure there are no extra spaces at the end of the last line) and clicking on the Add <p> clip. Repeat for each paragraph in the <bioghist> and <scopecontent>.
- Wherever they appear, titles of movies, plays, or books, which often appear underlined in the register should be tagged as <title render="italic">. Titles are displayed in italics on the EAD site, unless they are for articles, episodes, etc. which are displayed with double quotes. Wrap each title of a work in <title> tags following the same instructions as above. These titles will generally be highlighted on the annotated paper copy of the register.
- Make sure there is only one date tagged with the publication date in the <creation> tags of the <profiledesc>. (For example, <date era="ce" calendar="gregorian" type="publication" normal="2004-02"></date>)
- Look for unittitles that consist only of dates. Wrap each of these dates in <unitdate> tags (for example change "<unittitle>1950-1953</unittitle>" to "<unitdate>1950-1953</unitdate>". (Note: it is ok to have no <unittitle>.)
- Save the document.
- Copy the cleaned-up contents list and paste it in immediately after the section marked: <!--PASTE CONTAINER LIST HERE--> (at the end of the EAD document). Delete any stray lines between the contents list and the </dsc> tag.
- Add <unitid> to top of contents list, if not already included.
- Keep in mind there will be markup errors. Resist the urge to correct the following errors, as they will be fixed by the Final Clean-up clip:
- Closing tags that are missing or prematurely closed
- The "file" attribute in most <c> levels produced by Auto Box List
- Long strings of <c> levels generated by Auto Box List
- All of these things will be fixed by the Final Clean-up clip, so don’t worry about fixing them manually! It may not look "clean," but it will save a lot of time in the long run.
- Run the Pre Clean-up clip. This will eliminate unused fields in the template and insert standard language and codes based upon locations, etc.
- Run the Final Clean-up clip (under the Container List section). This clip runs a macro that performs the following tasks:
- Fixes the levels in the contents list so that they are nested properly
- Deletes the "file" attribute from the <c> tags (these are automatically added by the Auto Box List function)
- Puts paragraph breaks between each <tag> (to make the long strings generated by the Auto Box List function more readable)
- Proof the markup to look for obvious errors. See document “EAD Bugs to Look Out For” (L:/LIBARC/LIBARC SHARED/Archives Cataloging and EAD/EAD/EAD Procedures/EAD Bugs to Look Out For)
- Turn off Word Wrap. Validate the document by selecting the "Parse and Validate" button from the toolbar or by clicking the Parse and Validate clip (under the Transform section). A box titled "Confirm" will appear. Select "Yes."
- If there are errors in the validation, an "error.txt" file will open which will list the first error in your document. Use the error message to determine where the error resides in the EAD document. Hint: Sometimes the line and position numbers indicated in the error file are correct and other times they are misleading (particularly when the error relates to a nesting issue). Generally, however, the error is at or after the line and position number indicated by the validator. Correct the error and validate the document again. Repeat until the error file is returned with the file name/path only. This tells you that the document is free of tagging errors.
- Save the document.
- Write your name and the file name of the EAD document on the finding aid. Put in the "Review" pile.
D. Review
- Cataloging Archivist or Assistant Archivist to review markup including checking for common NoteTab Pro markup errors
- Fix errors and place in FTP pile
- When review is finished Cataloging Archivist or Assistant Archivist will put finding aid on test site
- EAD is processed every night and an email from UWDCC Sys Admin uwdccadmin-l@library.wisc.edu is sent to Cataloging Archivist and Assistant Archivist
- Place in On Test site & OK pile
F. On Test site & OK
- Cataloging Archivist and/or Assistant Archivist will review email to fix validation errors in EAD and review finding aid on test site. See Appendix H: Checklist for Review on Test Site.
- Place in Update logs pile
G. Update Logs
H. On Public site; Add links (catalog)
- UWDCC will contact through email list when ready for site upload
- Let UWDCC contact know of any handle changes to urls
- Let UWDCC contact know of any EADs to delete completely from site
- Update logs in L:/LIBARC/LIBARC SHARED/Archives Cataloging and EAD/EAD/EAD Stats
- Place in On Public site; Add links (catalog) pile
I. Cataloging Corrections
- Open catalog record for collection in OCLC. For more detailed instructions on searching and using OCLC and Alma see: (WHS Archives) Cataloging – Bibliographic Records – Updating on UW Libraries Shared Systems Knowledge Base (aka Shared Systems KB).
- Apply constant data for 555 and 856
- Edit – Constant data – Local – Apply from List
- Click OK [leave “Search for:” boxes blank]
- Select: 555 & 856
- Click on “Apply Selected”
- 555 __ Register.
- 856 42 $u [url] $z Register available online.
- Copy url from online finding aid Summary page listed after “URL to cite for this finding aid:”
- Replace “[url]” in 856
- Replace record in OCLC (Alt + F10)
- Find catalog record in Alma
- Check record in Alma to see if correct OCLC number is in 035
- Add OCLC number to record in Alma, if applicable
- Save and release record in Alma [Important step to remember]
- In OCLC record, export to Alma (F5)
- Check MMS ID number displayed in OCLC with MMS ID in Alma (usually 001 in bib record)
- Close OCLC record
- Repeat as needed for new finding aids; or replacement urls
- If during the course of work it is noticed that corrections need to be made to the cataloging (quantity, abstract, etc.) add to this pile
- Cataloging Archivist or Assistant EAD Archivist to make changes
J. Updates & Corrections
- Check "Updates and Corrections" pile each shift. Some are straight forward corrections that can be fixed quickly; others are adding new parts to already marked-up collections that may take longer.
- Download copy of EAD .xml file from Archive folder of UWDC server. Open Core FTP
- The password should already be saved (otherwise see Cataloging Archivist). Click on the folder "archive" in the right hand window to open all the EAD files already on the UWDC server
- Highlight the relevant file (files arranged numerically and alphabetically). The file name should be the last part of the finding aid's url after wiarchives.uw-whs-[file name]
- Drag file to the left hand window to paste to L:/LIBARC/LIBARC SHARED/Archives Cataloging and EAD/EAD/EAD Updates. If a different folder appears, click on Directory Tree to select L drive.
- Exit Core FTP
- Open file in EAD Updates folder into NoteTab Pro or <oXygen/>
- Make corrections as specified on paper copy of finding aid
- For additions, add call number(s) to list of call numbers and accession number to list of accession numbers
- Update quantity, as needed
- Double check dates in titles; check in <titleproper> as well as collection <unitdate>
- For new contents lists: markup list as outlined in Section C “Annotating & Markup”
- For additions with two or more parts:
- If existing finding aid is only one part, create a “New EAD” in NoteTab Pro
- Create a “New EAD” in NoteTab Pro, selecting a "Combined" collection
- Follow instructions for “Markup of Front Matter” in part 6 of Section C
- Enter Part information: number of parts; call number(s) of each individual part; and titles with dates for each part. Example titles: Original Collection, [dates]; Additions, [dates]. Combined State Records may differ.
- Enter quantity for each part in the <physdesc> under the contents list
- Move the original scope and content for finding aid down to Part 1 in the contents list
- Copy and paste abstract/scope and content for Part 2 and on, as needed
- In a separate tab copy the original contents list, now Part 1; shift the components down one level, in NoteTab Pro select Shift levels under Container List. (List should now start and end with <c02>.)
- Copy and paste contents list under Part 1 after </scopecontent> and before </c01>
- Copy and paste contents list for Part 2 and on, as needed
- If existing find aid already has 2 or more parts
- Add part(s) to arrangement note and change number of parts in note
- Add <c01> at end of content list for each new part:
<c01 level="subfonds" id="p#">
<did>
<unitid>Call number</unitid>
<unittitle>Part # ([call number(s)]): Additions, [date]</unittitle>
<physdesc></physdesc>
</did>
<scopecontent><p></p></scopecontent>
</c01>- Replace # in id="p#" and <unittitle> with part number
- Enter call number under <unitid>; and all call numbers associated with the part in <unittitle>
- Add quantity of part in <physdesc>
- Add abstract/scope and content
- Copy and paste content list for part
- Repeat as necessary
- For additions, add date to <creation> field: “additions added by WHS staff, <date era="ce" calendar="Gregorian" type="publication" normal="2015-08">August 2015</date>. Replace original <date ...> publication tag with just <date>; there can only be one date tagged with the publication date tag
- Save file
- Mark paper copy of finding aid with “Updated,” the date, and your initials, and put into the FTP pile (Step E.)
K. FTP’ed (completed)
- When everything is finished and live on the public site add to pile
- Keep for 2 years then recycle – give any finding aids longer than 100 pages to Cataloging Archivist as reference copy