(System) - Setup the Resource Sharing Directory connection with SWITCH schools
Once the MOU is approved by all schools we can proceed with the technical steps.
STEP 1: Join the Resource Sharing Directory and setup your member items, if you have not already done so.
-
- This is in Alma Config>Fulfillment>Resource Sharing Membership
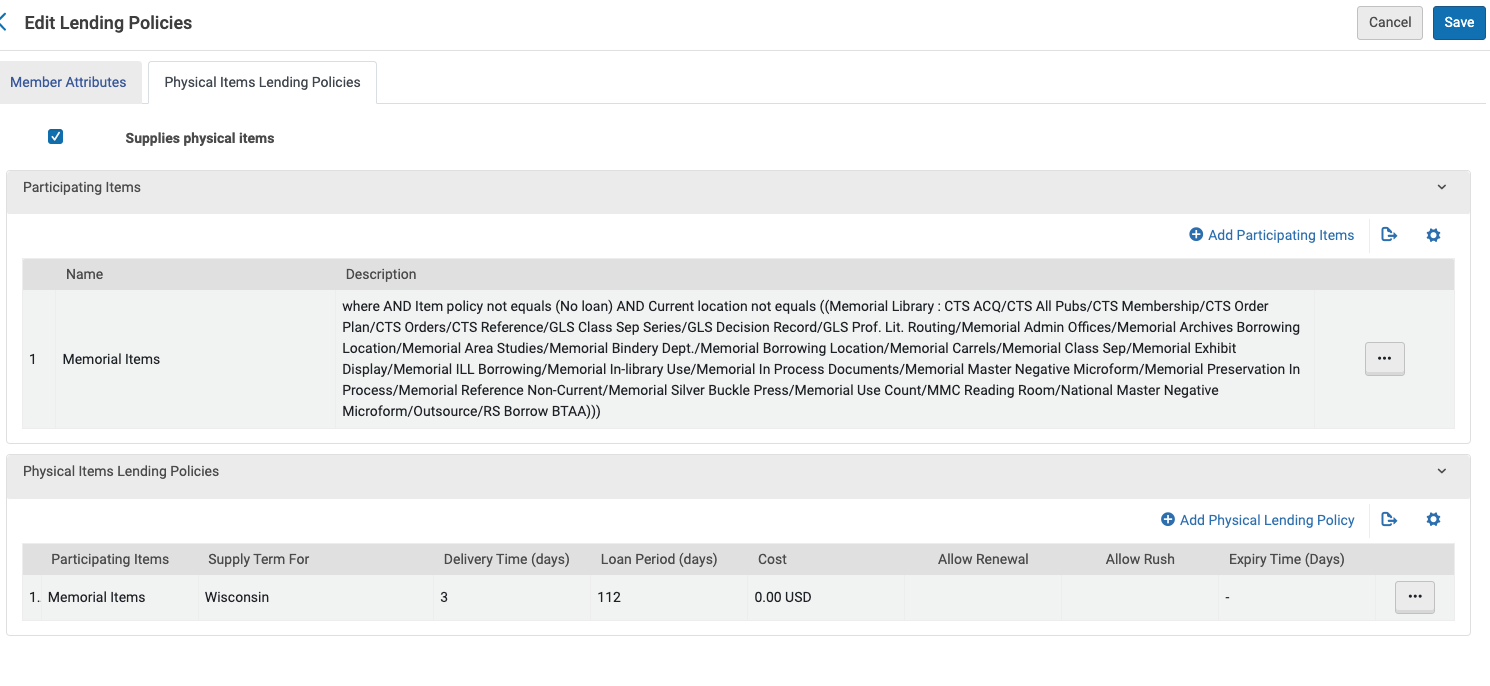
- Set up your Member library and mark which items you would share to Wisconsin members. Screenshot of Memorial's settings -
- It did take a few days for our campuses to show up in the partner lists. I would just check each morning and let SWITCH know.
STEP 2: Once one campuses appeared in the CZ list of Partners they can copy in the SWITCH partners you are borrowing from and save them to your IZ.
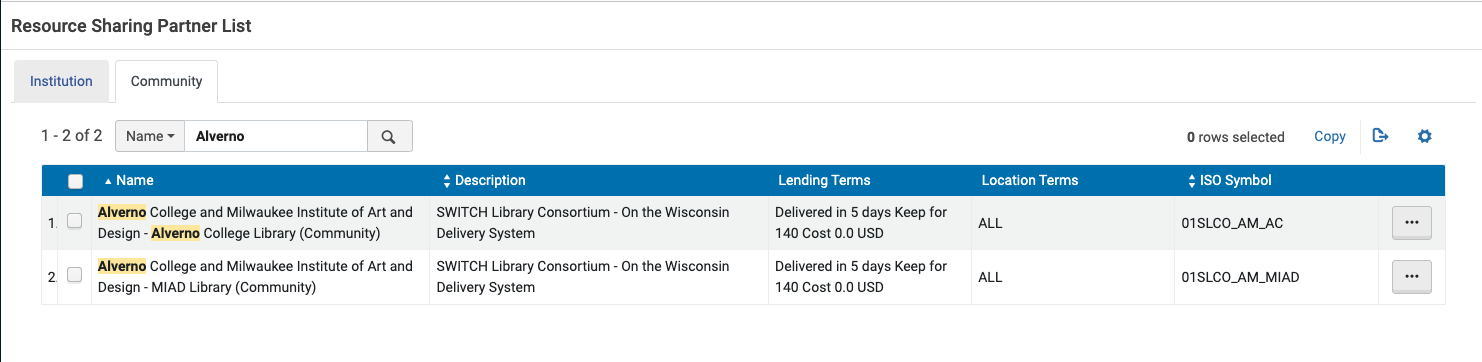
- Fulfillment>Partners>Community and search for the SWITCH Schools - there are 7 of them, Alverno, MIAD, Concordia University, Mount Mary University, Wisconsin Lutheran College, Sacred Heart Seminary School of Theology, and Saint Francis de Sales Seminary. (Note this is under regular Fulfillment not Alma Config>Fulfillment).
- Click copy to copy in the partner record to your IZ
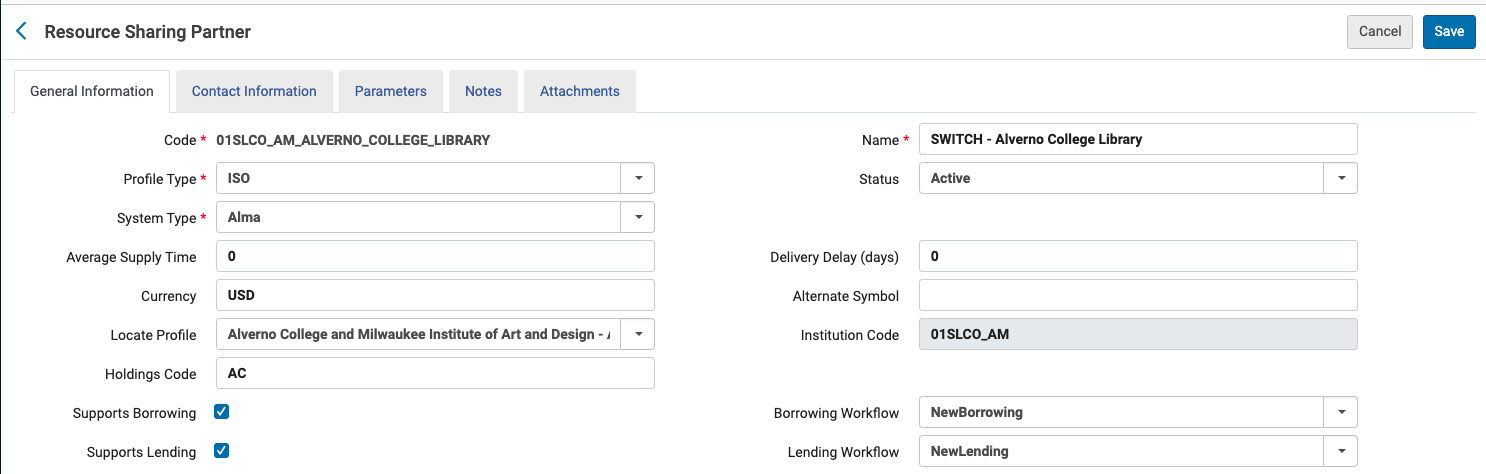
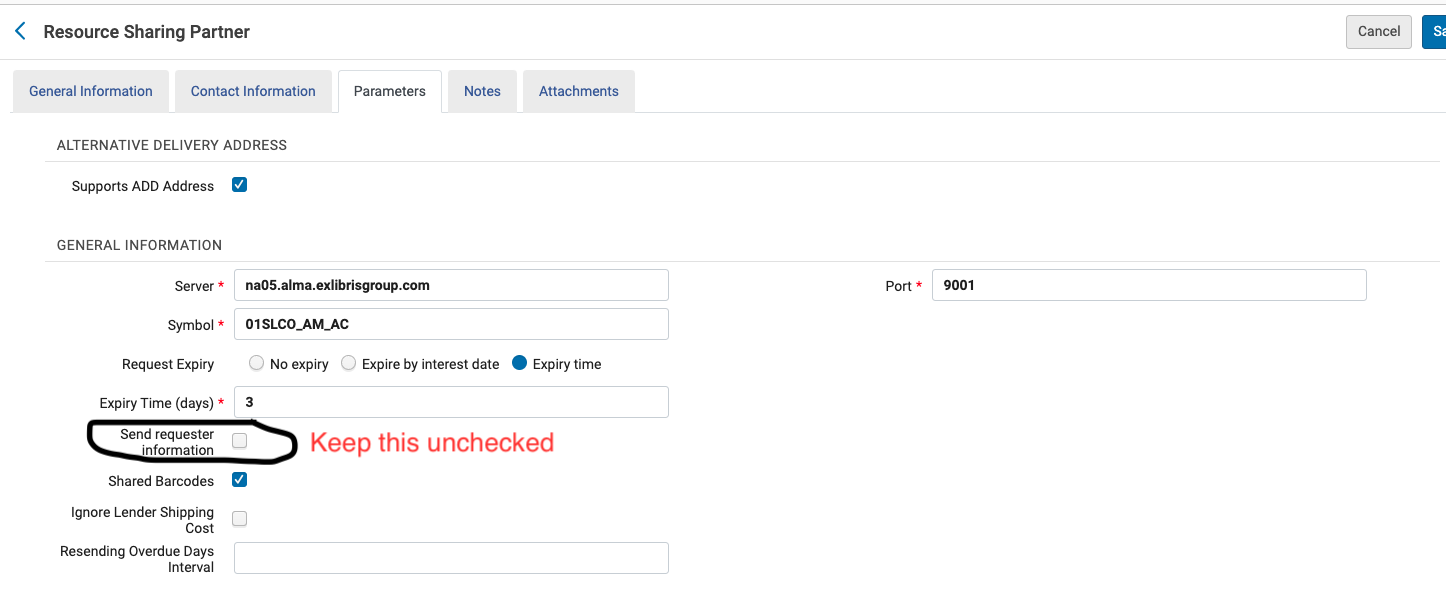
- Once you have them copied in, edit each and check to make sure the records are okay. You want to make sure borrowing and lending is set on the first tab, and only Shared Barcodes is checked on the 3rd tab - We can not send Requester Information to SWITCH. Make sure this box is UNCHECKED. Make sure you click Save when you have verified it is correct.
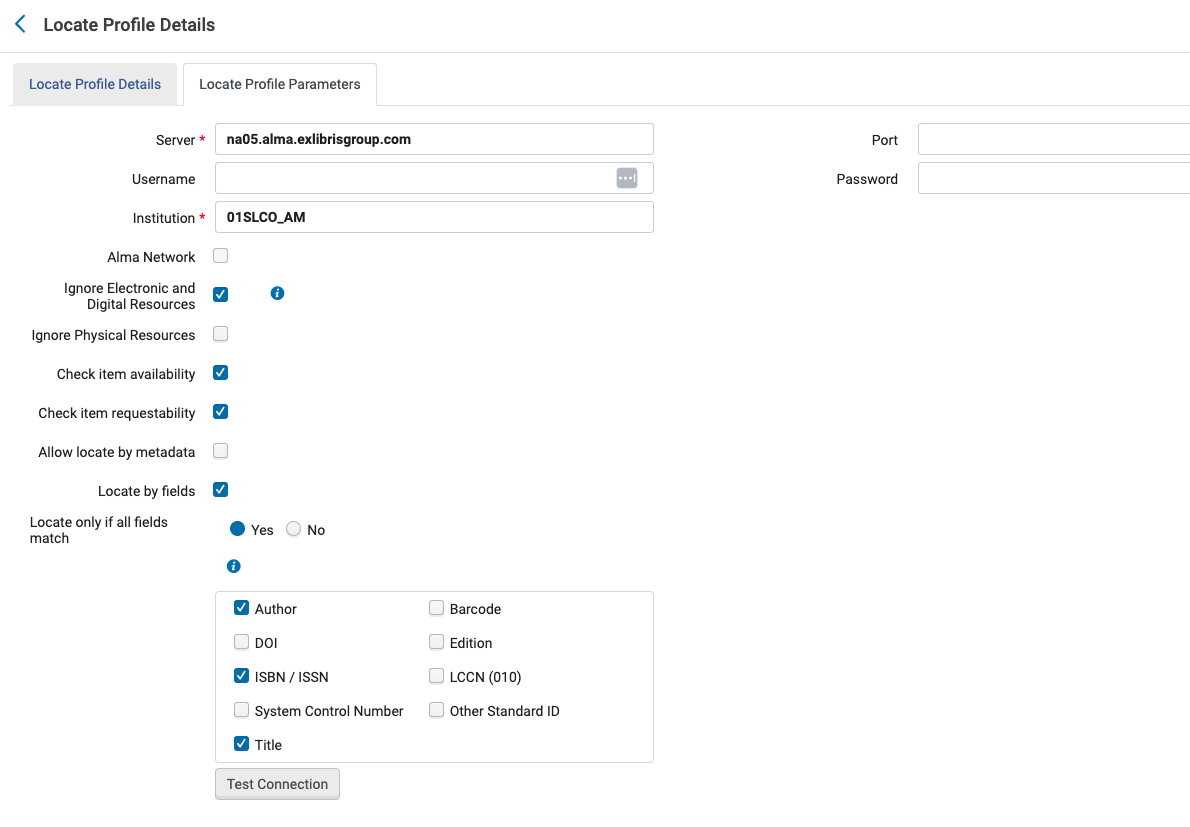
4. You want to double check the Locate Profiles as this can cause problems. Alma Config> Fulfillment>Locate Profiles - edit each SWITCH school.
-
On the second tab, make sure Alma Network is not checked and the other fields are set up like this - Note, this is different from how we run locate. Our profiles are shared out of the NZ, please do not touch those.
-
STEP 3: Create a new Item Policy, TOUs and Fulfillment Unit Rules
- Set Up a new item policy and TOU to go with this new partner's lending time frame.
- Create a new item policy - Alma Config>Fulfillment>Item Policy> Add a new itme policy. You can call it something with 112 days in it.

- Create TOUs. Make sure in Alma Config you are at the top level like University of Wisconsin - xxx. Alma Config>Fulfillment.Terms of Use>
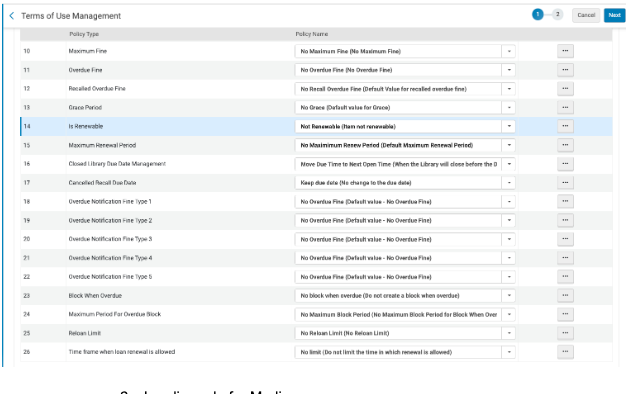
- You need a Loan TOU for Switch Loans - it should be loanable, 112 days, with no renewals allowed.
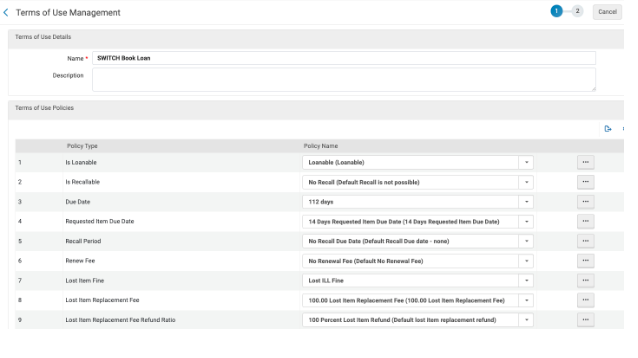
5. Lending rule for books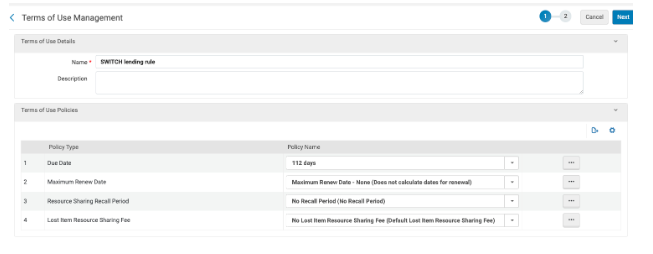
6. Lending rule for media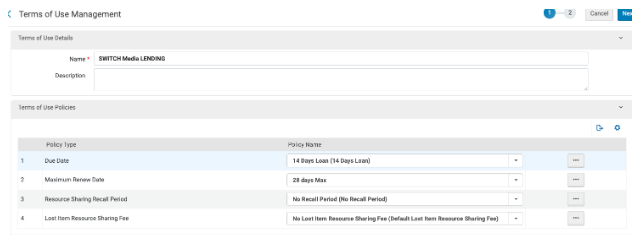
STEP 4: Create Fulfillment rules - here you want to be at the main library>Alma Config>Fulfillment>Fulfillment Unit
- Click on the … by the RS_FU. (Our main libraries are also the default RS library)
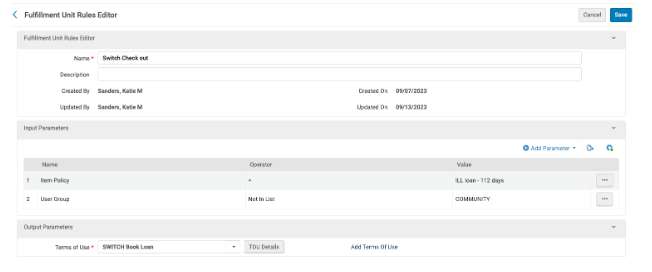
- Create a Loan rule for the Switch Book loan, where the item policy is your new 112 day and the TOU is your SWITCH book Loan (you can also add a user group is not COMMUNITY or whichever group you limit). We should not need to create a SWITCH media loan rule as it is the same as the existing UW Media rule.
- Move the rule up above the last undergrad rule and your end of term - staff and grad rule. Remember those rules should look like a pyramid.
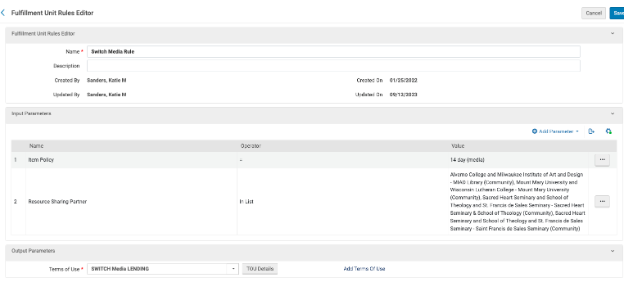
- Change the settings to Lending Resource Sharing rules. Create a Switch Media rule - the item policy is 14 day media, Resource Sharing Partner In List - 7 SWITCH schools and the TOU should be the SWITCH Media Lending.
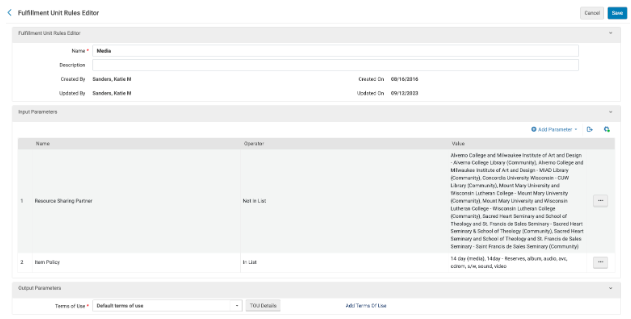
- Go back and edit your existing Media rule so it has a new parameter that has Resource Sharing Partner NOT in list and has the 7 SWITCH schools.
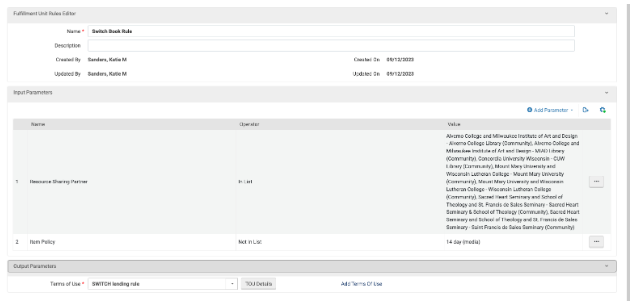
- Create a Switch Book Rule - that Includes the Resource Sharing Partner in List (the 7 SWITCH schools) and Item Policy Not in List 14 days media and the TOU should be the SWITCH Lending rule.
- Make sure the order of Lending Resource Sharing, is UW media, Switch Media, Switch book, UW book. *** Campuses with multiple libraries now need to repeat these 3 rules in each RS library that is not an Archives library that you are setting up with SWITCH.
STEP 5: Create temporary item creation rules - make sure you are at the main RS library.
- Alma Config>(Main Library level)>Fulfillment>Temporary Item Creation Rule
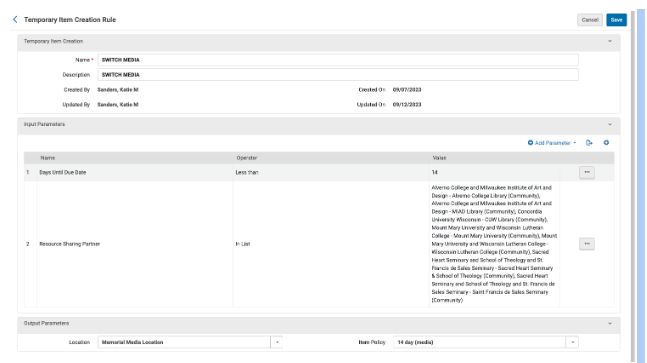
- Switch Media -
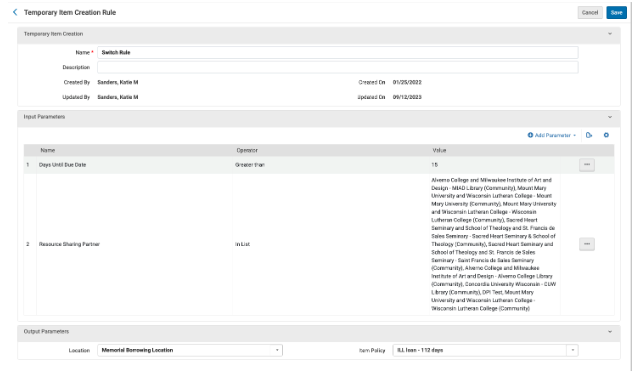
- Switch Book rule
- Order these so the Switch Media is below the main media with the Switch book rule below that.
STEP 6: Update the Overdue and Lost Loan profiles
- Make sure you are at the top University of Wisconsin level.
- Alma Config>Fulfillment>Overdue and Lost Loan Profile
-
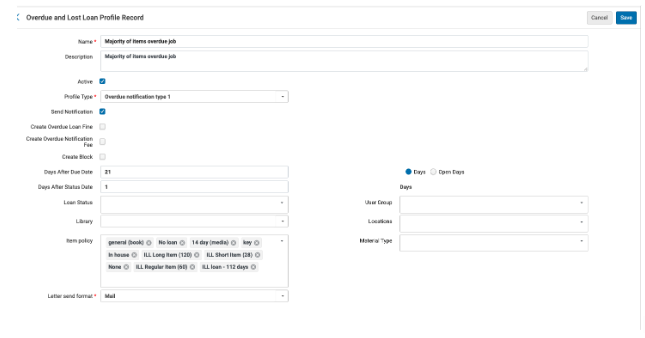
- Find the Majority of item overdue job - make sure add your new item policy to the rule and Save.
- Do not run the Status Update! This is for implementation.
- Find the Majority of items - lost and edit it and add your new item policy and save
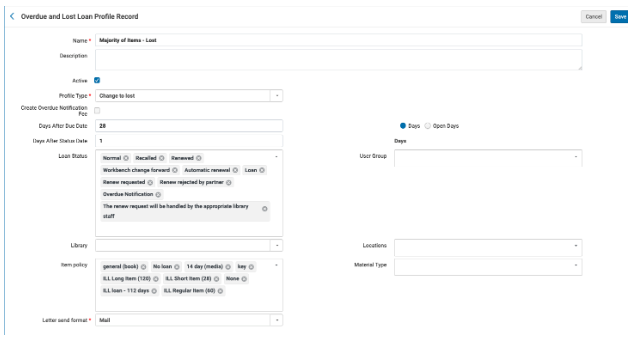
- Do not run the Status Update! This is for implementation.
STEP 7: Update your shipping letter to accommodate the new partner.
-
- Alma Config>General>Letter Configuration>Edit the Resource Sharing Shipping Slip Letter.
-
- Need to add this block and you can use the Madison slip though it has extras in it you might not want.
- Alma Config>General>Letter Configuration>Edit the Resource Sharing Shipping Slip Letter.
<!--Setup for Switch Redbox delivery for WI-->
<xsl:when test="starts-with(notification_data/partner_code, '01SLCO')">
<tr><td valign="top" style="border:0px solid black; width:50%; padding:10px;">
<h3 style="text-align: left; weight: bold">@@supplied_to@@: </h3>
<h1 style="text-align: left; weight: bold">SWITCH <br /> - <xsl:value-of select="normalize-space(substring-after(notification_data/partner_name, ('-')))"/>
</h1><br /><br />
<xsl:if test="notification_data/incoming_request/note">
<b>@@request_note@@: </b>
<xsl:value-of select="notification_data/incoming_request/note"/>
</xsl:if>
<p align="left" style="font-size:18px;">
<xsl:if test="notification_data/group_qualifier" ><b>@@group_qualifier@@: </b><xsl:value-of select="notification_data/incoming_request/external_request_id"/></xsl:if></p>
<p align="left" style="font-size:18px; font-weight:bold;">Due date:_____________</p>
<p align="left" style="font-size:22px; font-weight:bold;">Please do not remove this slip.</p>
</td>
<td valign="top" style="border:0px solid black; width:50%; padding:10px;"></td>
</tr>
</xsl:when>
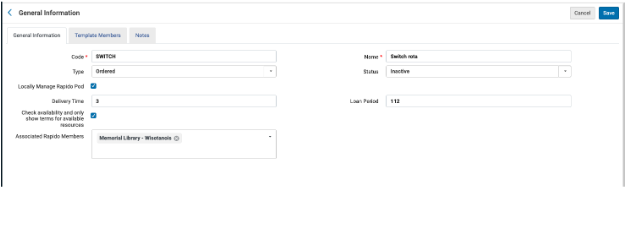
STEP 8: Set up a new rota with all your new friends on it in the IZ, but turn it off. Katie will show you where this is so each campus can turn it on or off.
-
-
This is just under Fulfillment>Rota Template>Create new Rota
-
Make sure you keep this off.
-
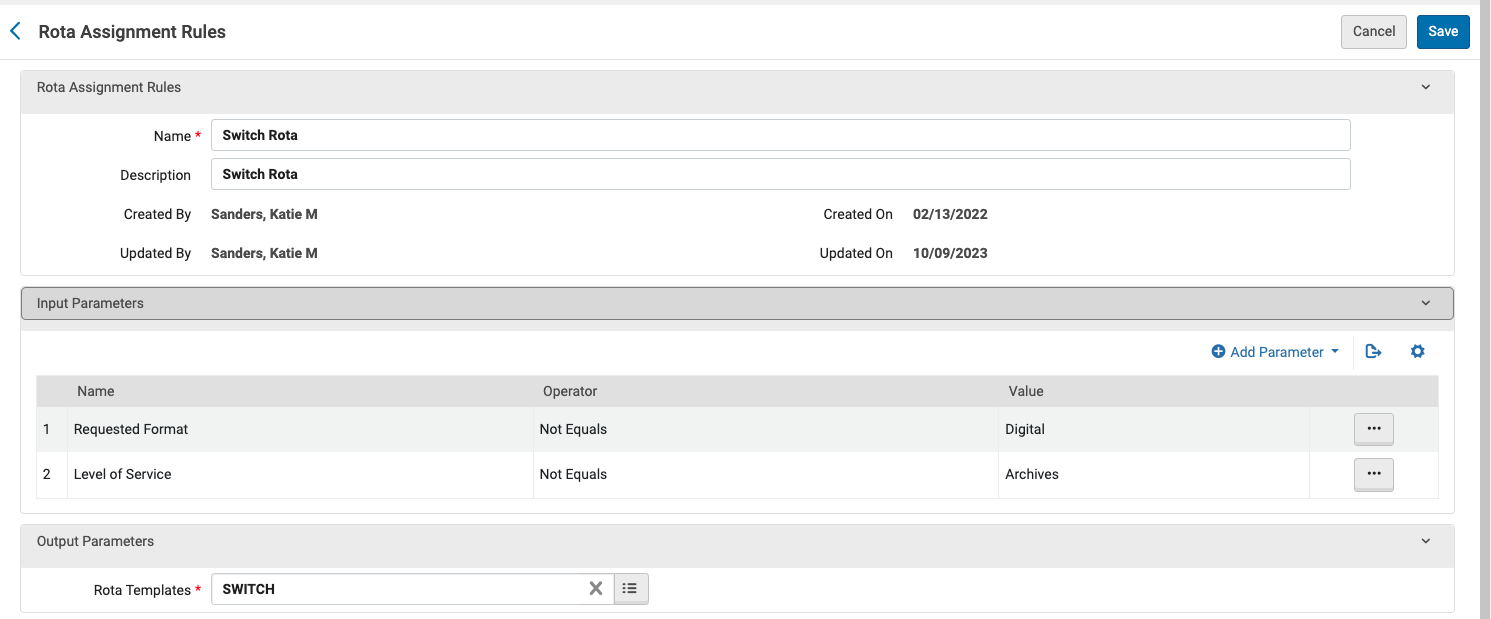
Katie will then set up a new rota assignment rule on a Sunday, this will say when a user has exhausted the UW rota it will fall to your new partner rota. (This is in Alma Config>Institutional Level>Fulfillment>Rota Assignment Rules)
-
Step 9: Send Test requests back and forth between partners
Step 10: To go live - turn on the rota